|
 |
|
80mm Refractor Project |
Go back to HOMEPAGE
|
|
|
|
80mm Refractor Project |
Go back to HOMEPAGE
|
SUMMARY This story begins when I purchased a used Lumicon 80mm Super Finder body off Ebay. I bought the big finder to use as a guide scope on my SCT, but also as a grab-n-go scope. I paid ~ $150 including shipping. Very quickly I found that this telescope did not meet my needs, as is described below. I used the optical tube + an objective from Surplus Shed + a Crawford style focuser from Agena Astro + some machining and other ensundry handy work to build a functioning f5 achromatic refractor.
|
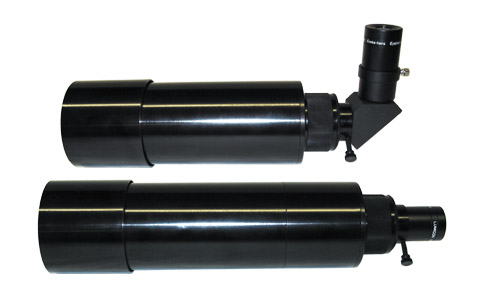
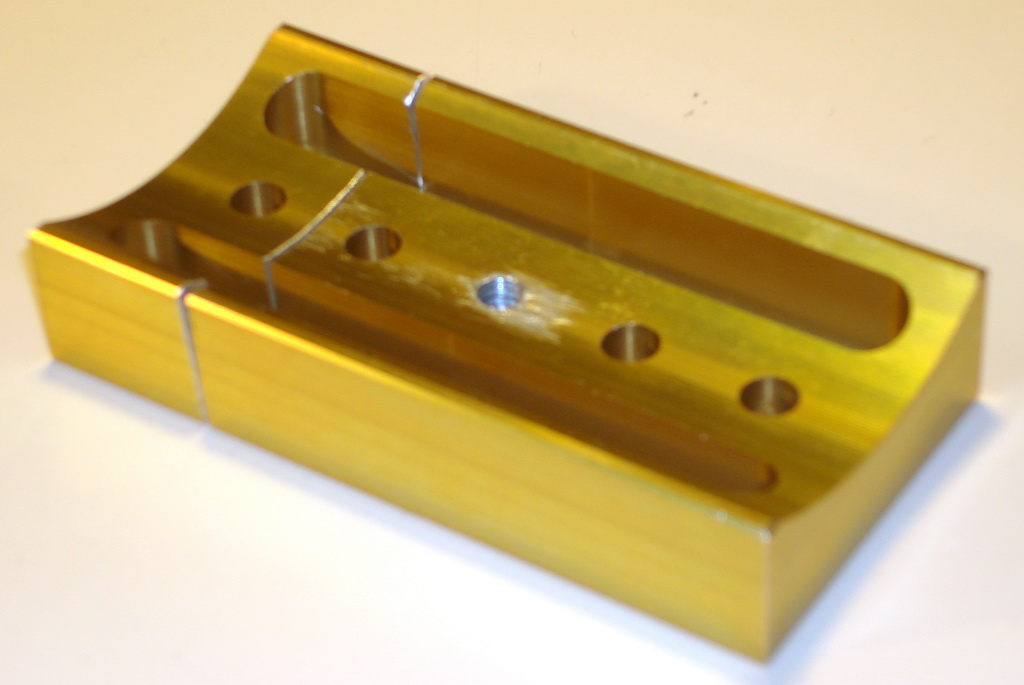
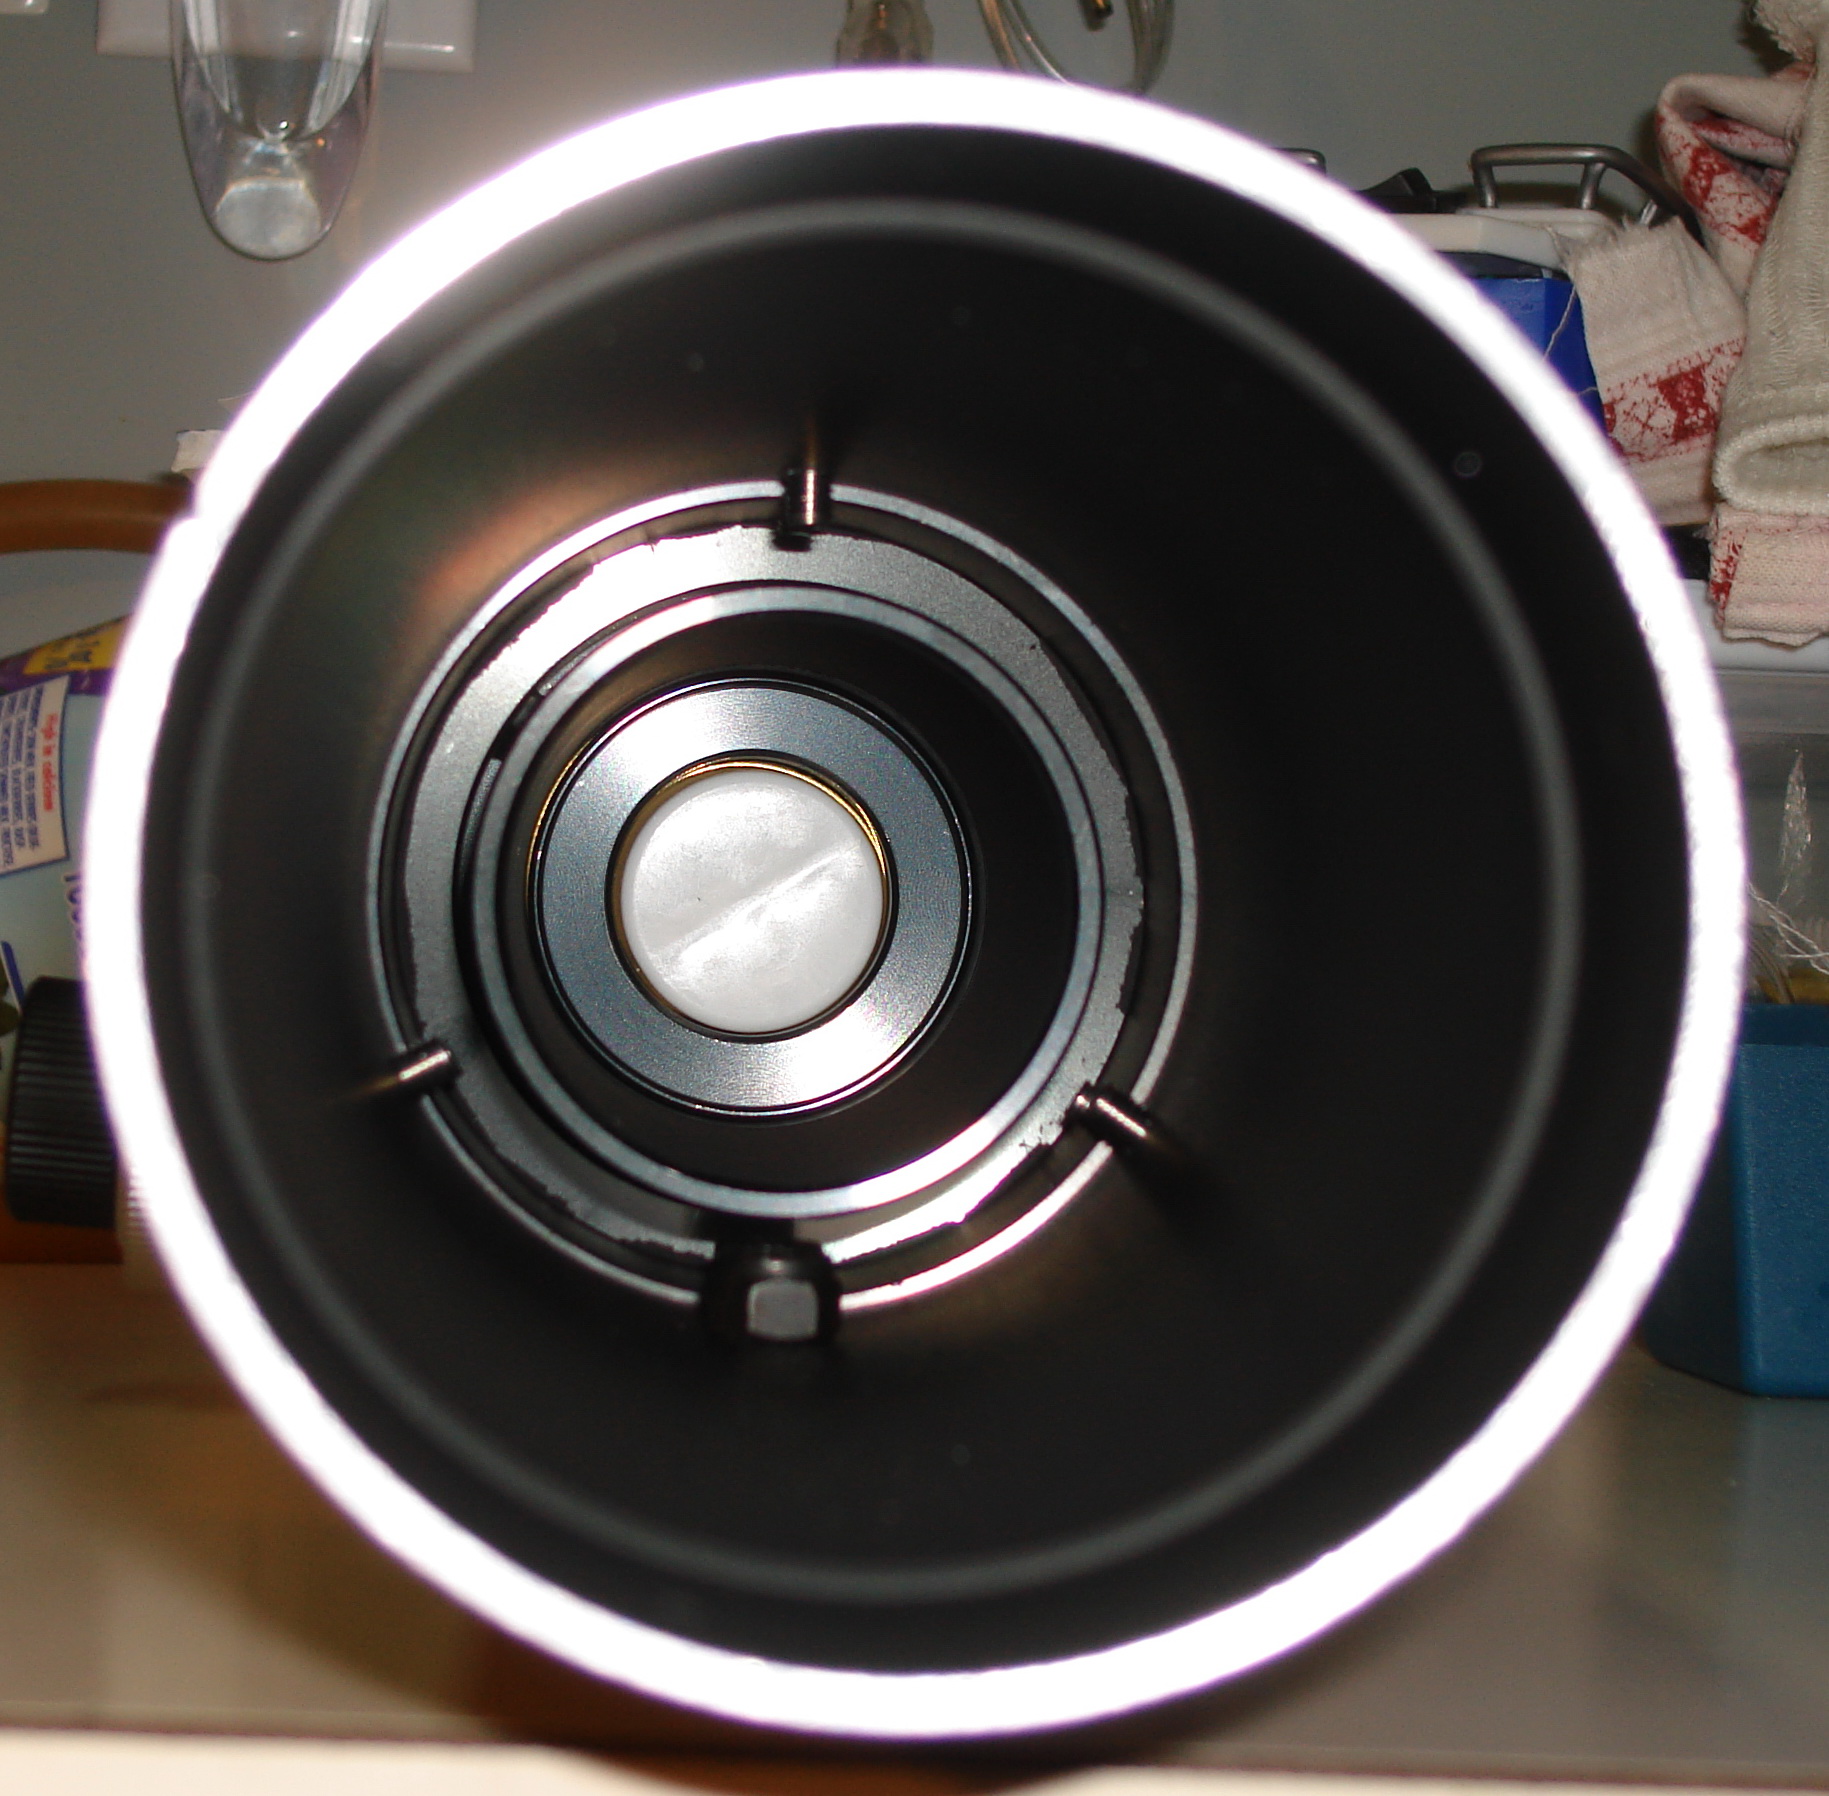
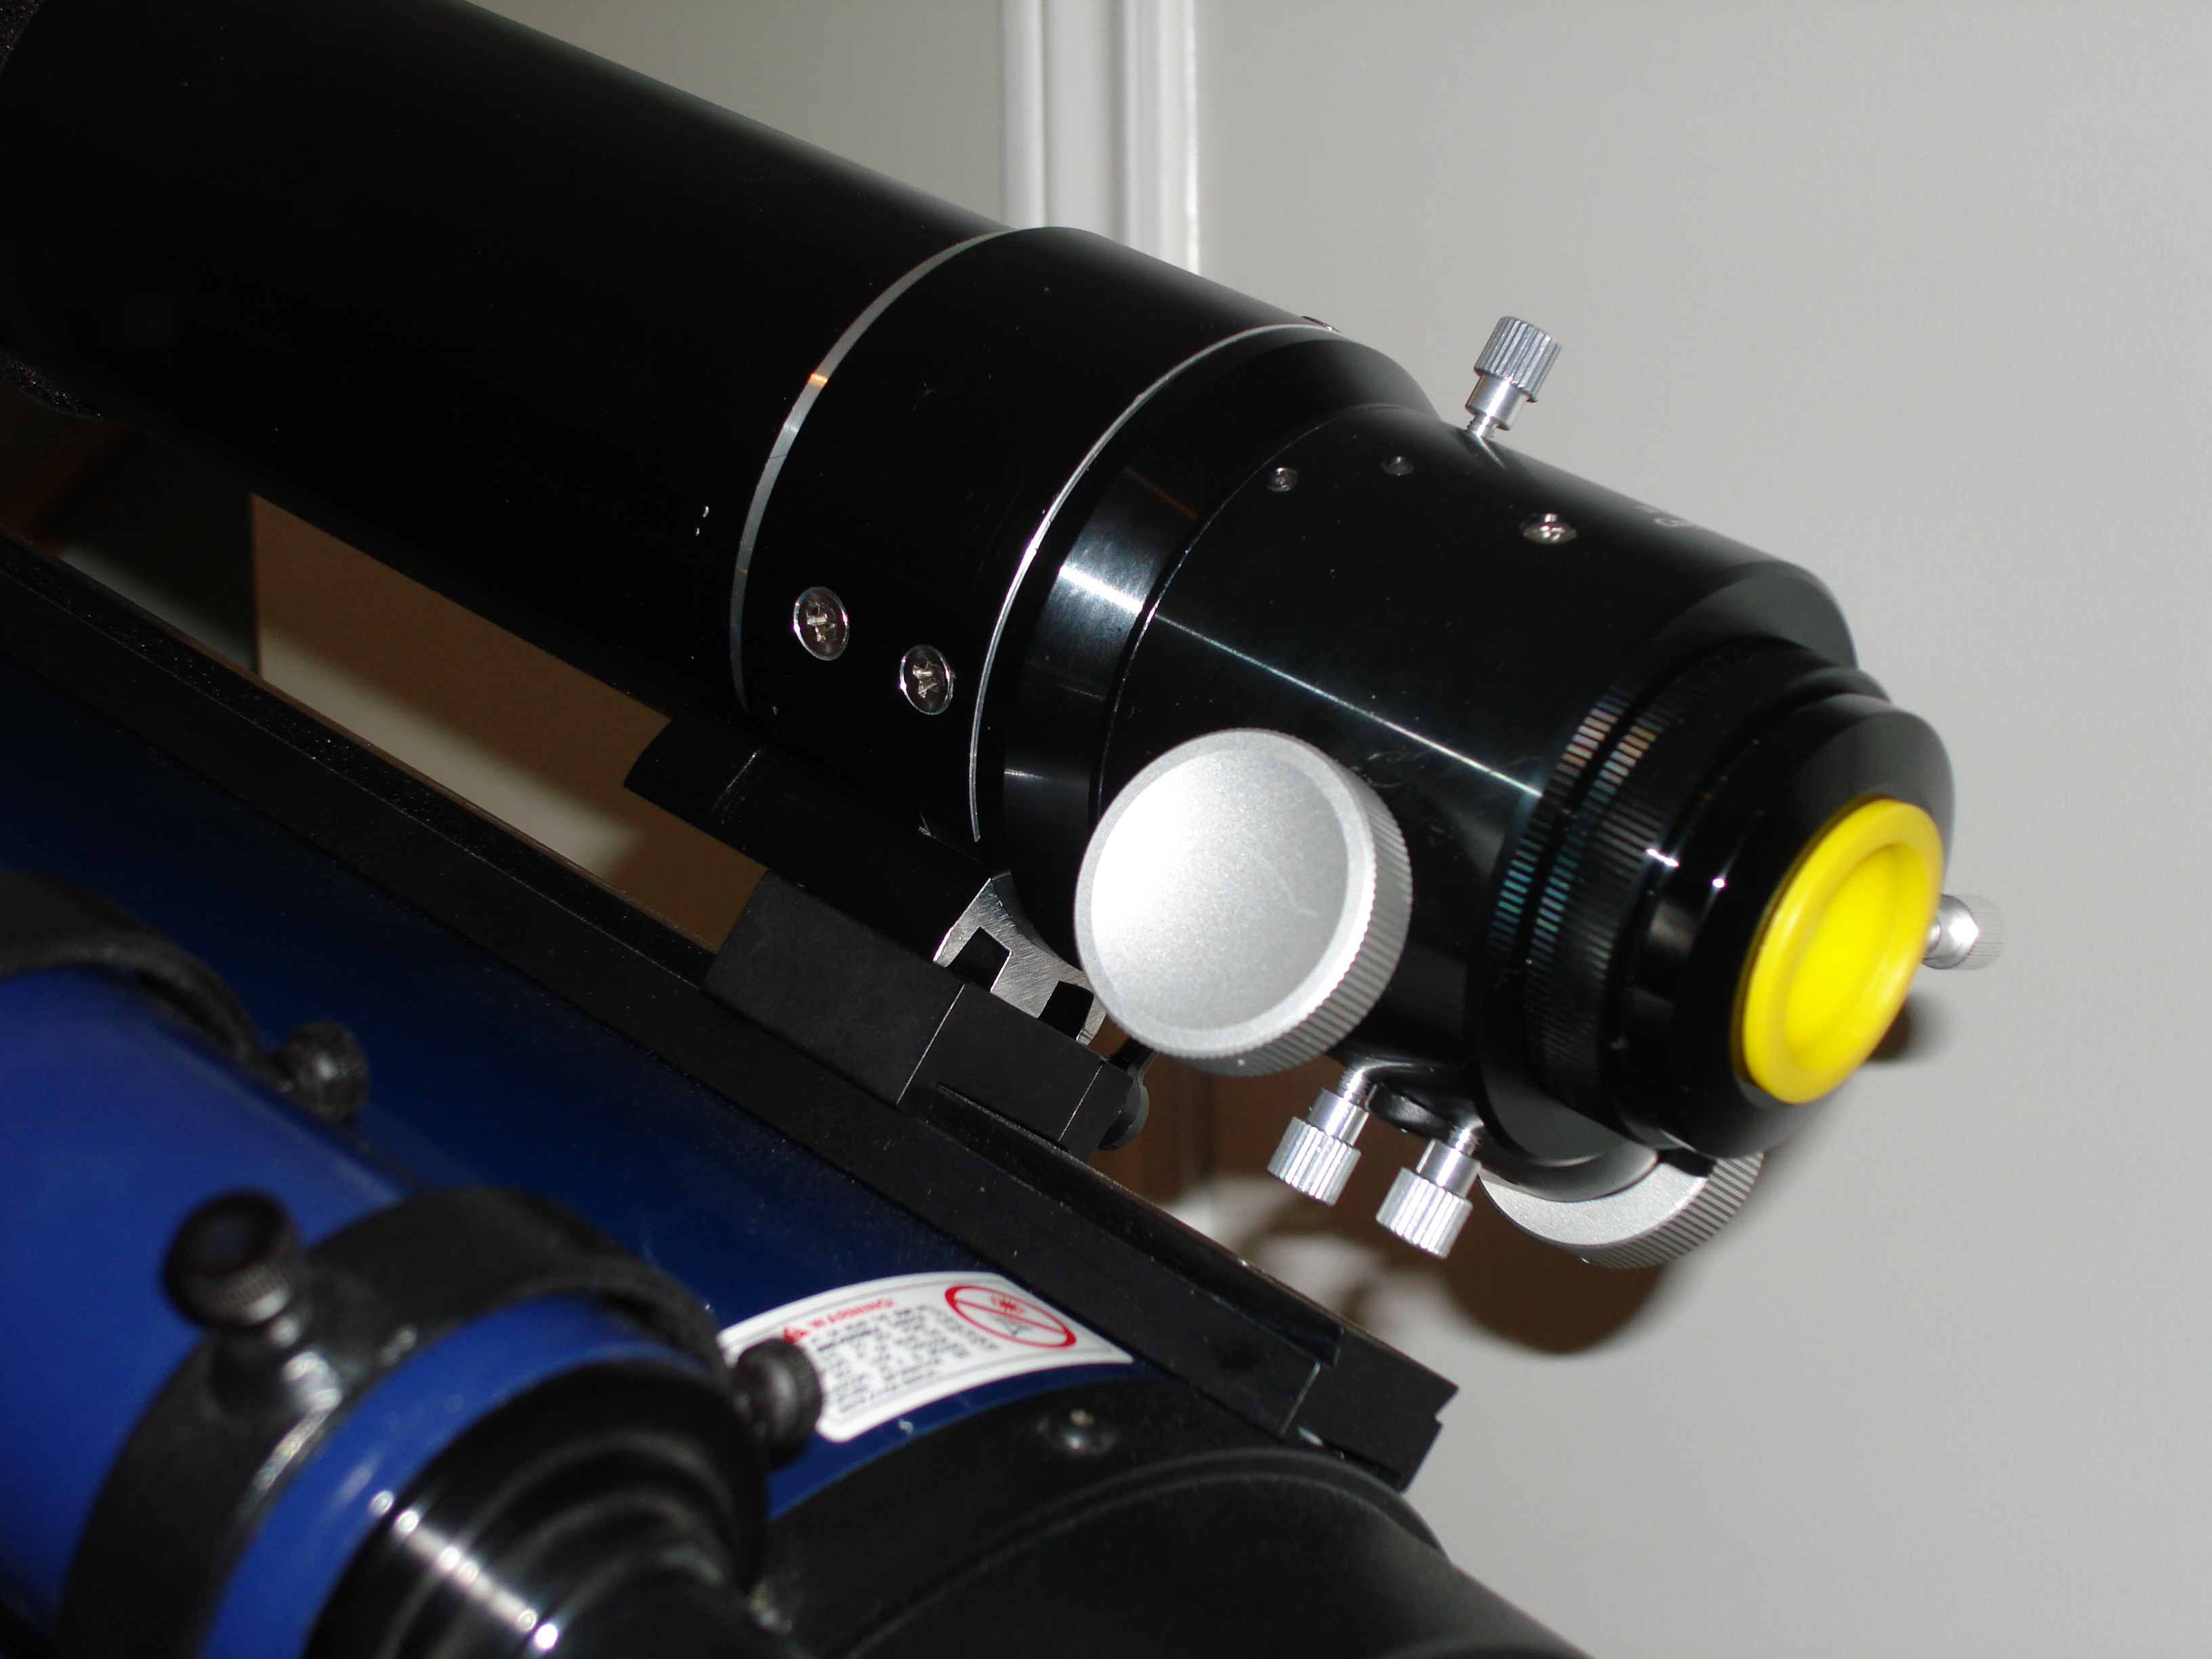
| October 2, 2009 I got it today, and when I looked at it for the first time I immediately thought: "holy mackeral, its big and solid!". I was not really sure what an 80mm refractor looked like until I saw this big guy. It is certainly well made, all finely machined from aluminum and black anodised; much like everything Lumicon makes. Immediately I can tell though that the mounting bracket is not at the centre-of-gravity of the scope, so I have drafted up a model for a new block and had my friend at work (Scott) who has a 5-axis CNC milling machining in his garage make it for me. The mounting block turned out sweet, but in the meantime I have discovered some other more important problems with the scope. |
| October 16, 2009 I had the 80mm Lumicon out for a test drive. I just had it attached to a standard photography tripod, and used the two eyepieces that came with my SCT, a Meade 4000 series Plossl 26mm, and a Televue Radian 10mm. I very quickly identified some problems with the scope:
I am not happy now that I see that this scope is probably unusable for my purposes! |
| October 17, 2009 Further investigation in the workshop revealed some additional facts about the telescope:
|
| October 20, 2009 I have done a lot of mulling over what to do with my Lumicon 80mm. I looked around at what else is out there for reasonably priced wide-FOV refractors. I even considered a small Maksutov-Cassegrain as a replacement. In the end I have decided to try to rebuild the Lumicon scope so that it meets my needs. Specifically my plans include:
|
| November 15, 2009 I purchased a new Meade 1.25" focuser off Ebay for cheap, $9USD. It came today, and now that I look at it, I'm not sure it will do what I want. It is a replacement rack-and-pinion style focuser from a Meade 70mm refractor. It has lots of focuser travel (~3"), but is made of plastic. It also has a baffle part way down the focuser tube limiting the open aperture to about 18mm. After thinking about how this will all go together I realised that the 1.25" focuser tube was going to cut off the light cone from the objective for a large part of the focuser's travel. I need a bigger diameter focuser if I am to take advantage of the full 80mm aperture!
|
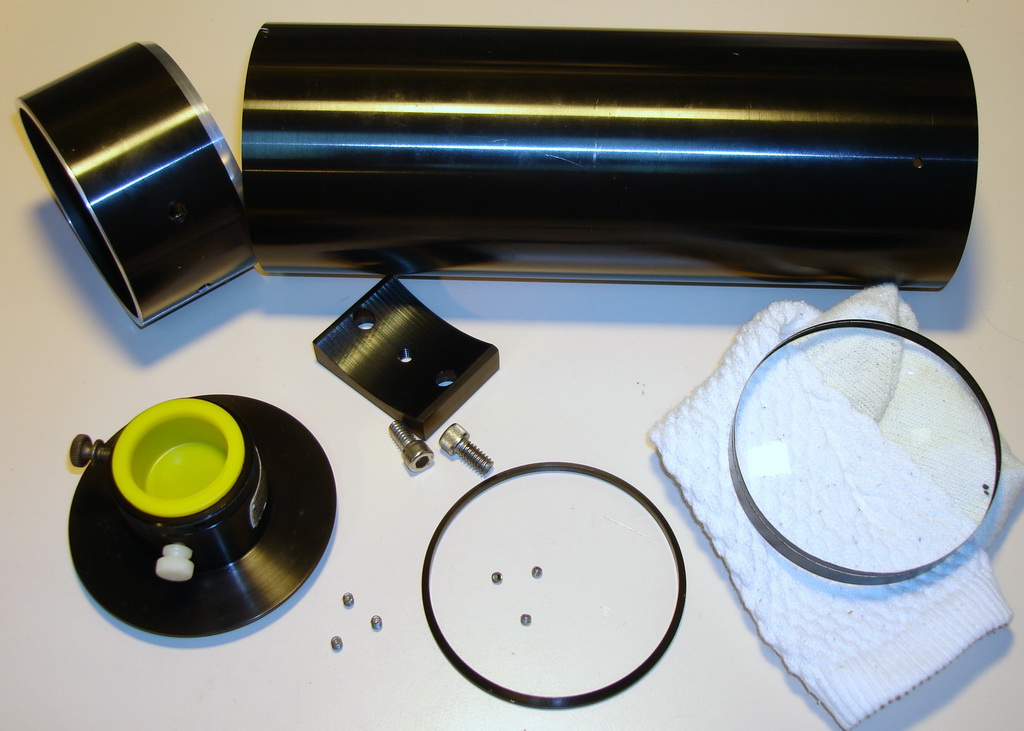
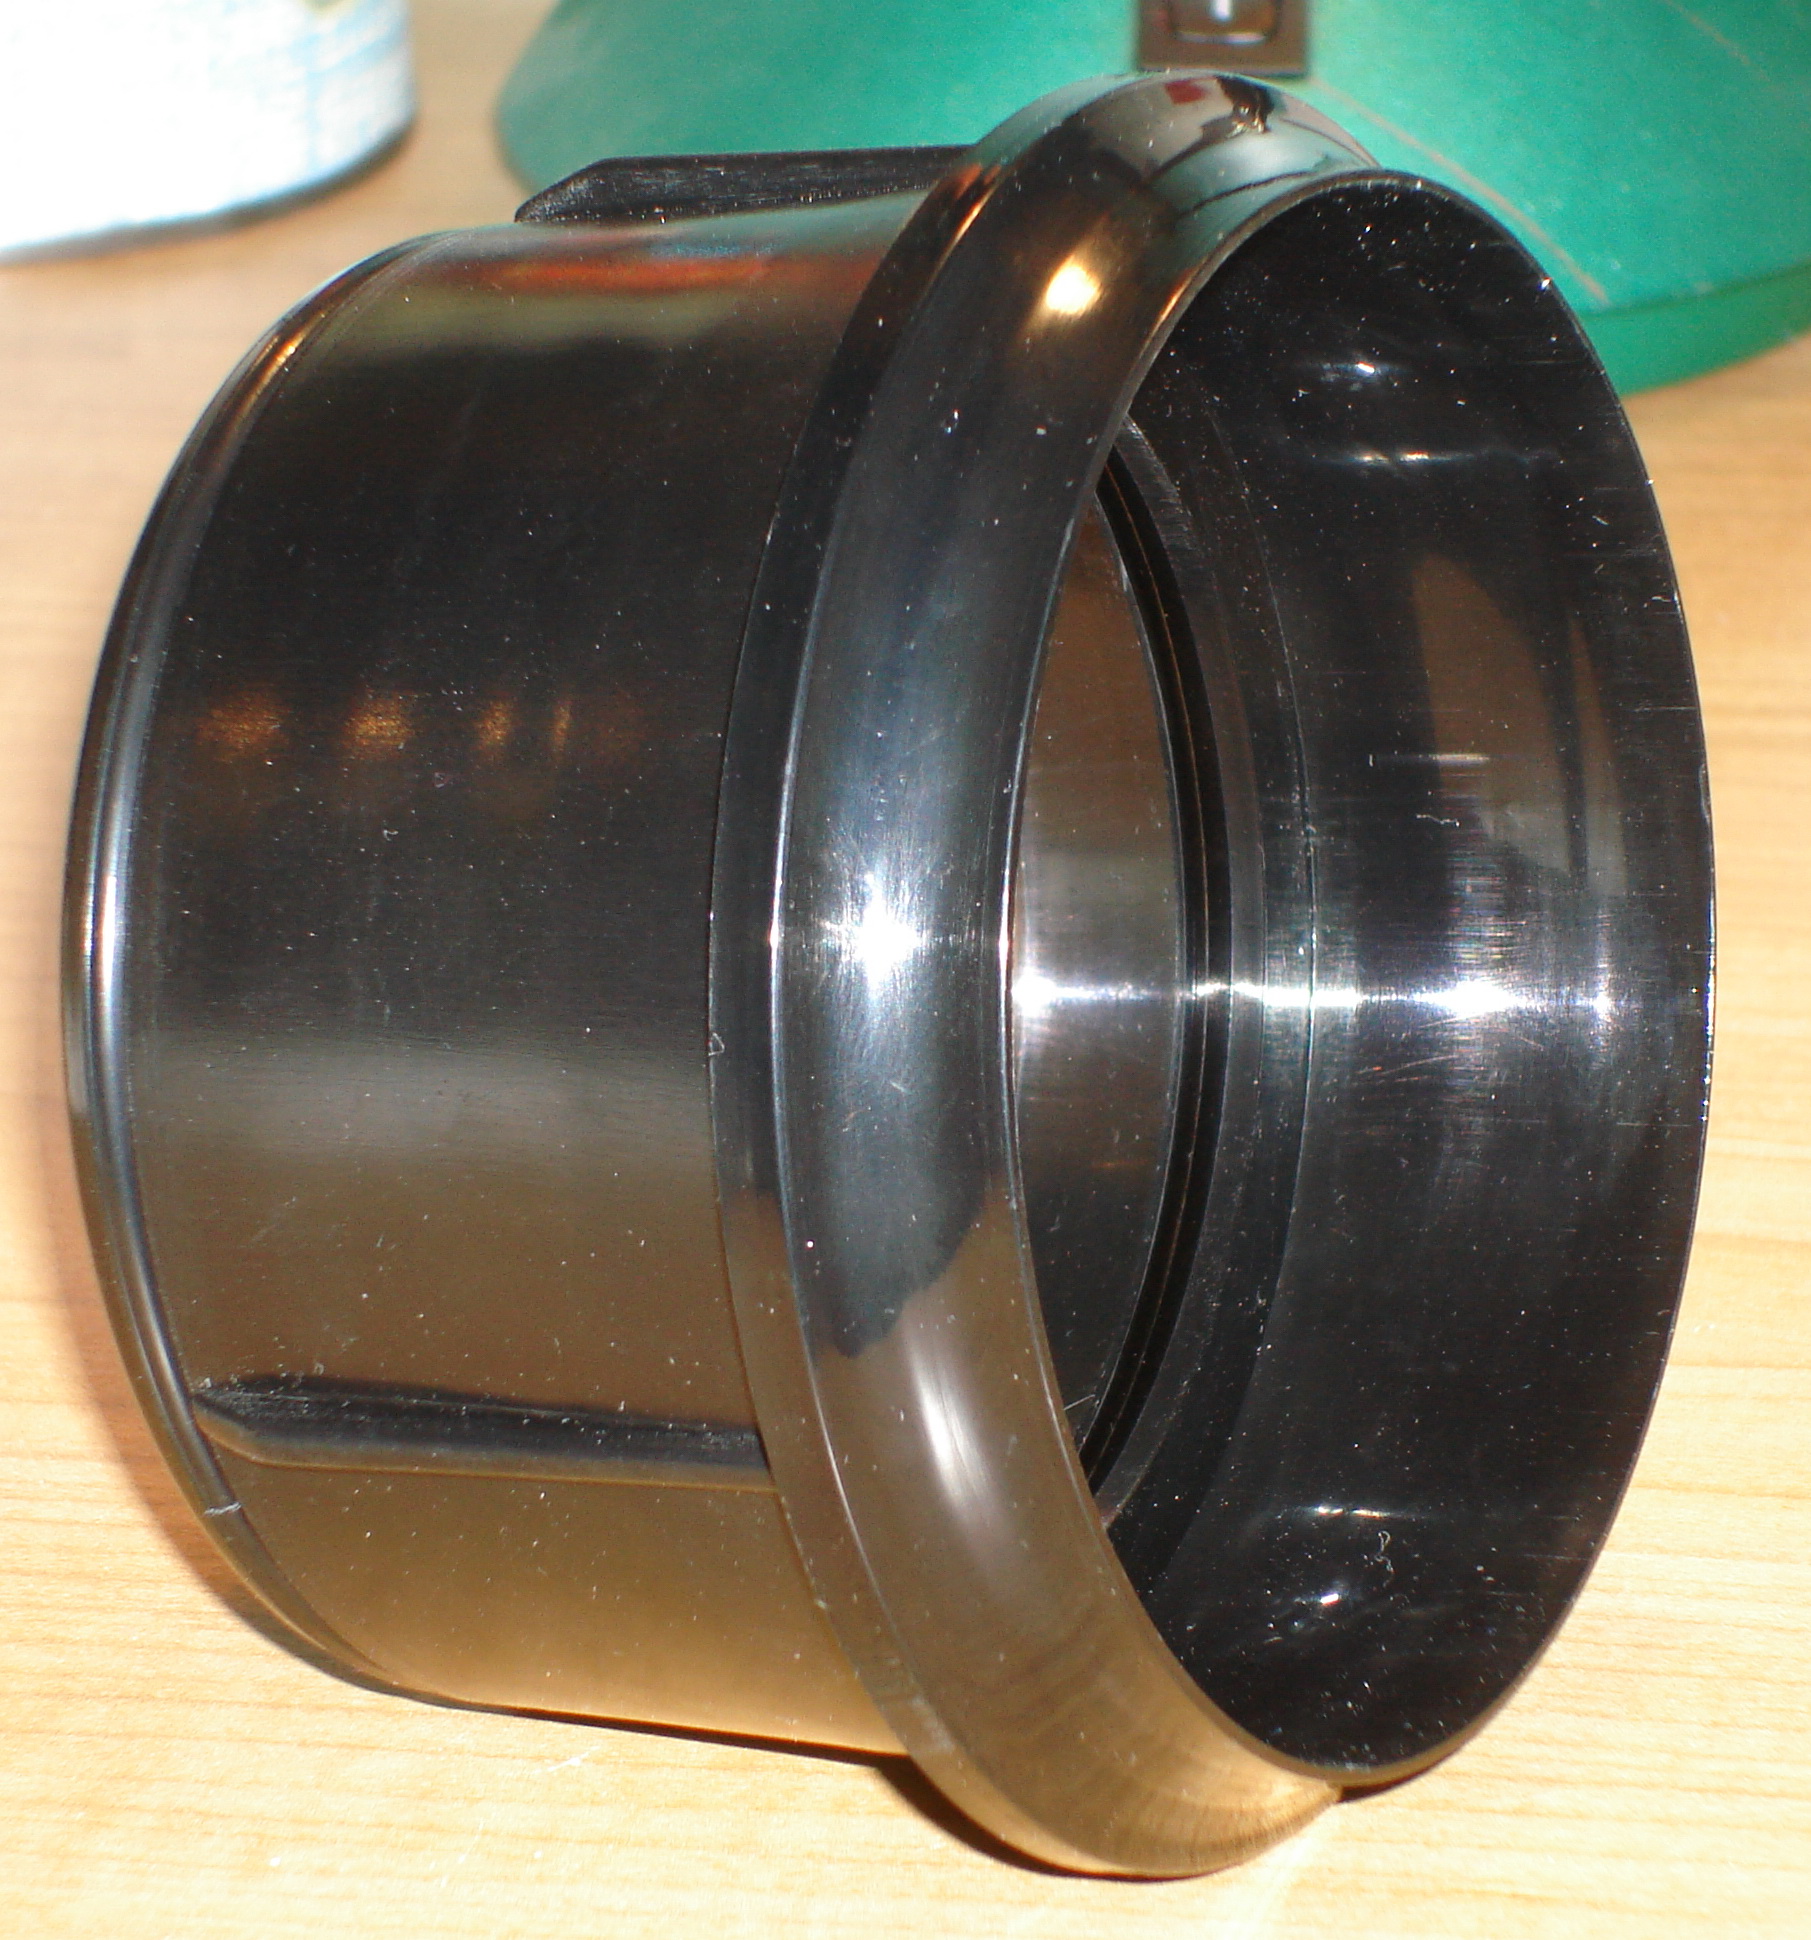
| November 27, 2009 The objective I ordered from Surplus Shed came in today. I have been impressed by Surplus Shed. Their prices and customer service is very good, and the amount of bizarre cool stuff they have is amazing! Anyway, the objective I purchased has an aperture of 80mm with a focal length of 400mm, and only cost $30. It came in a big plastic cell, but luckily the retaining ring was easily unscrewed to allow the lense to be removed. I don't know who made this lense, but it seems to be of good quality. The crown and flint are fully coated on both sides. It is hard to tell for sure, but I think the crown has roughly the same curvature on both sides. The flint is a meniscus shape with a slight curvature on the back face. There is a thin plastic spacer between the two lenses. My guess from the shapes is that this is a Clark style doublet or a Fraunhofer, I don't know for sure which. I went for the 400mm focal length because I thought it would maintain the large FOV I wanted, but alleviate somewhat the issue of the focuser tube cutting into the light cone when focused in.
|
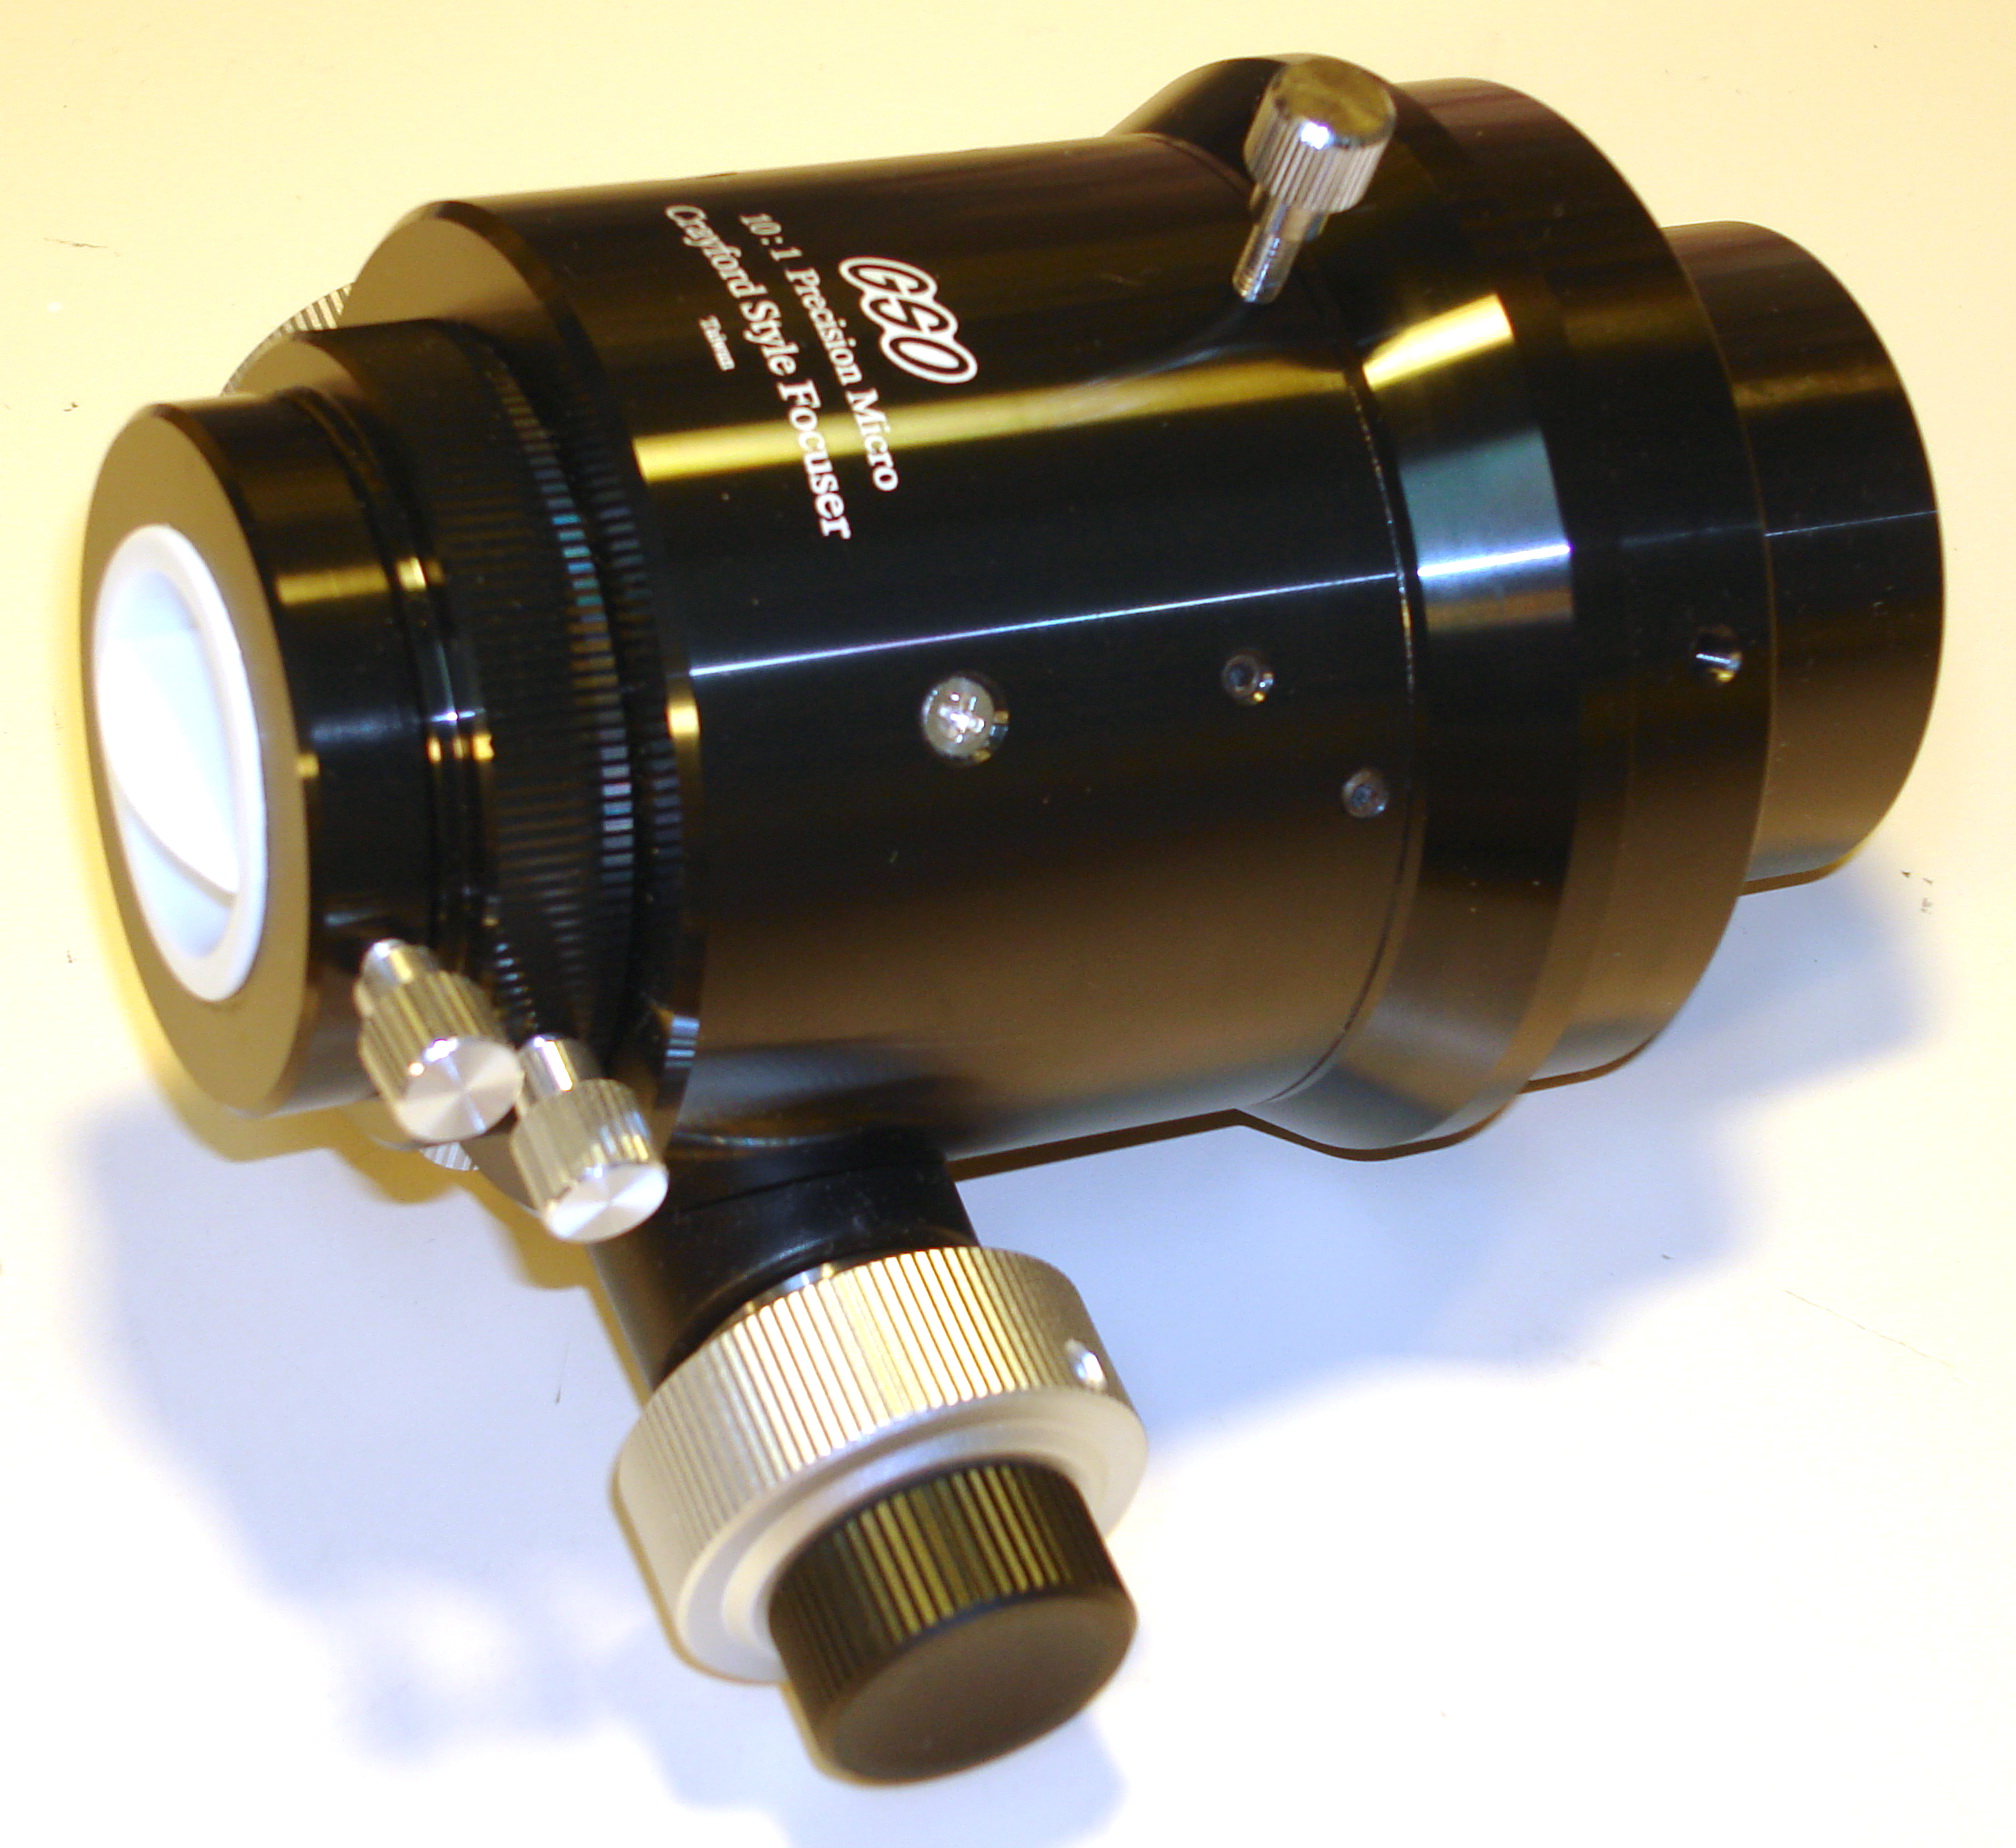
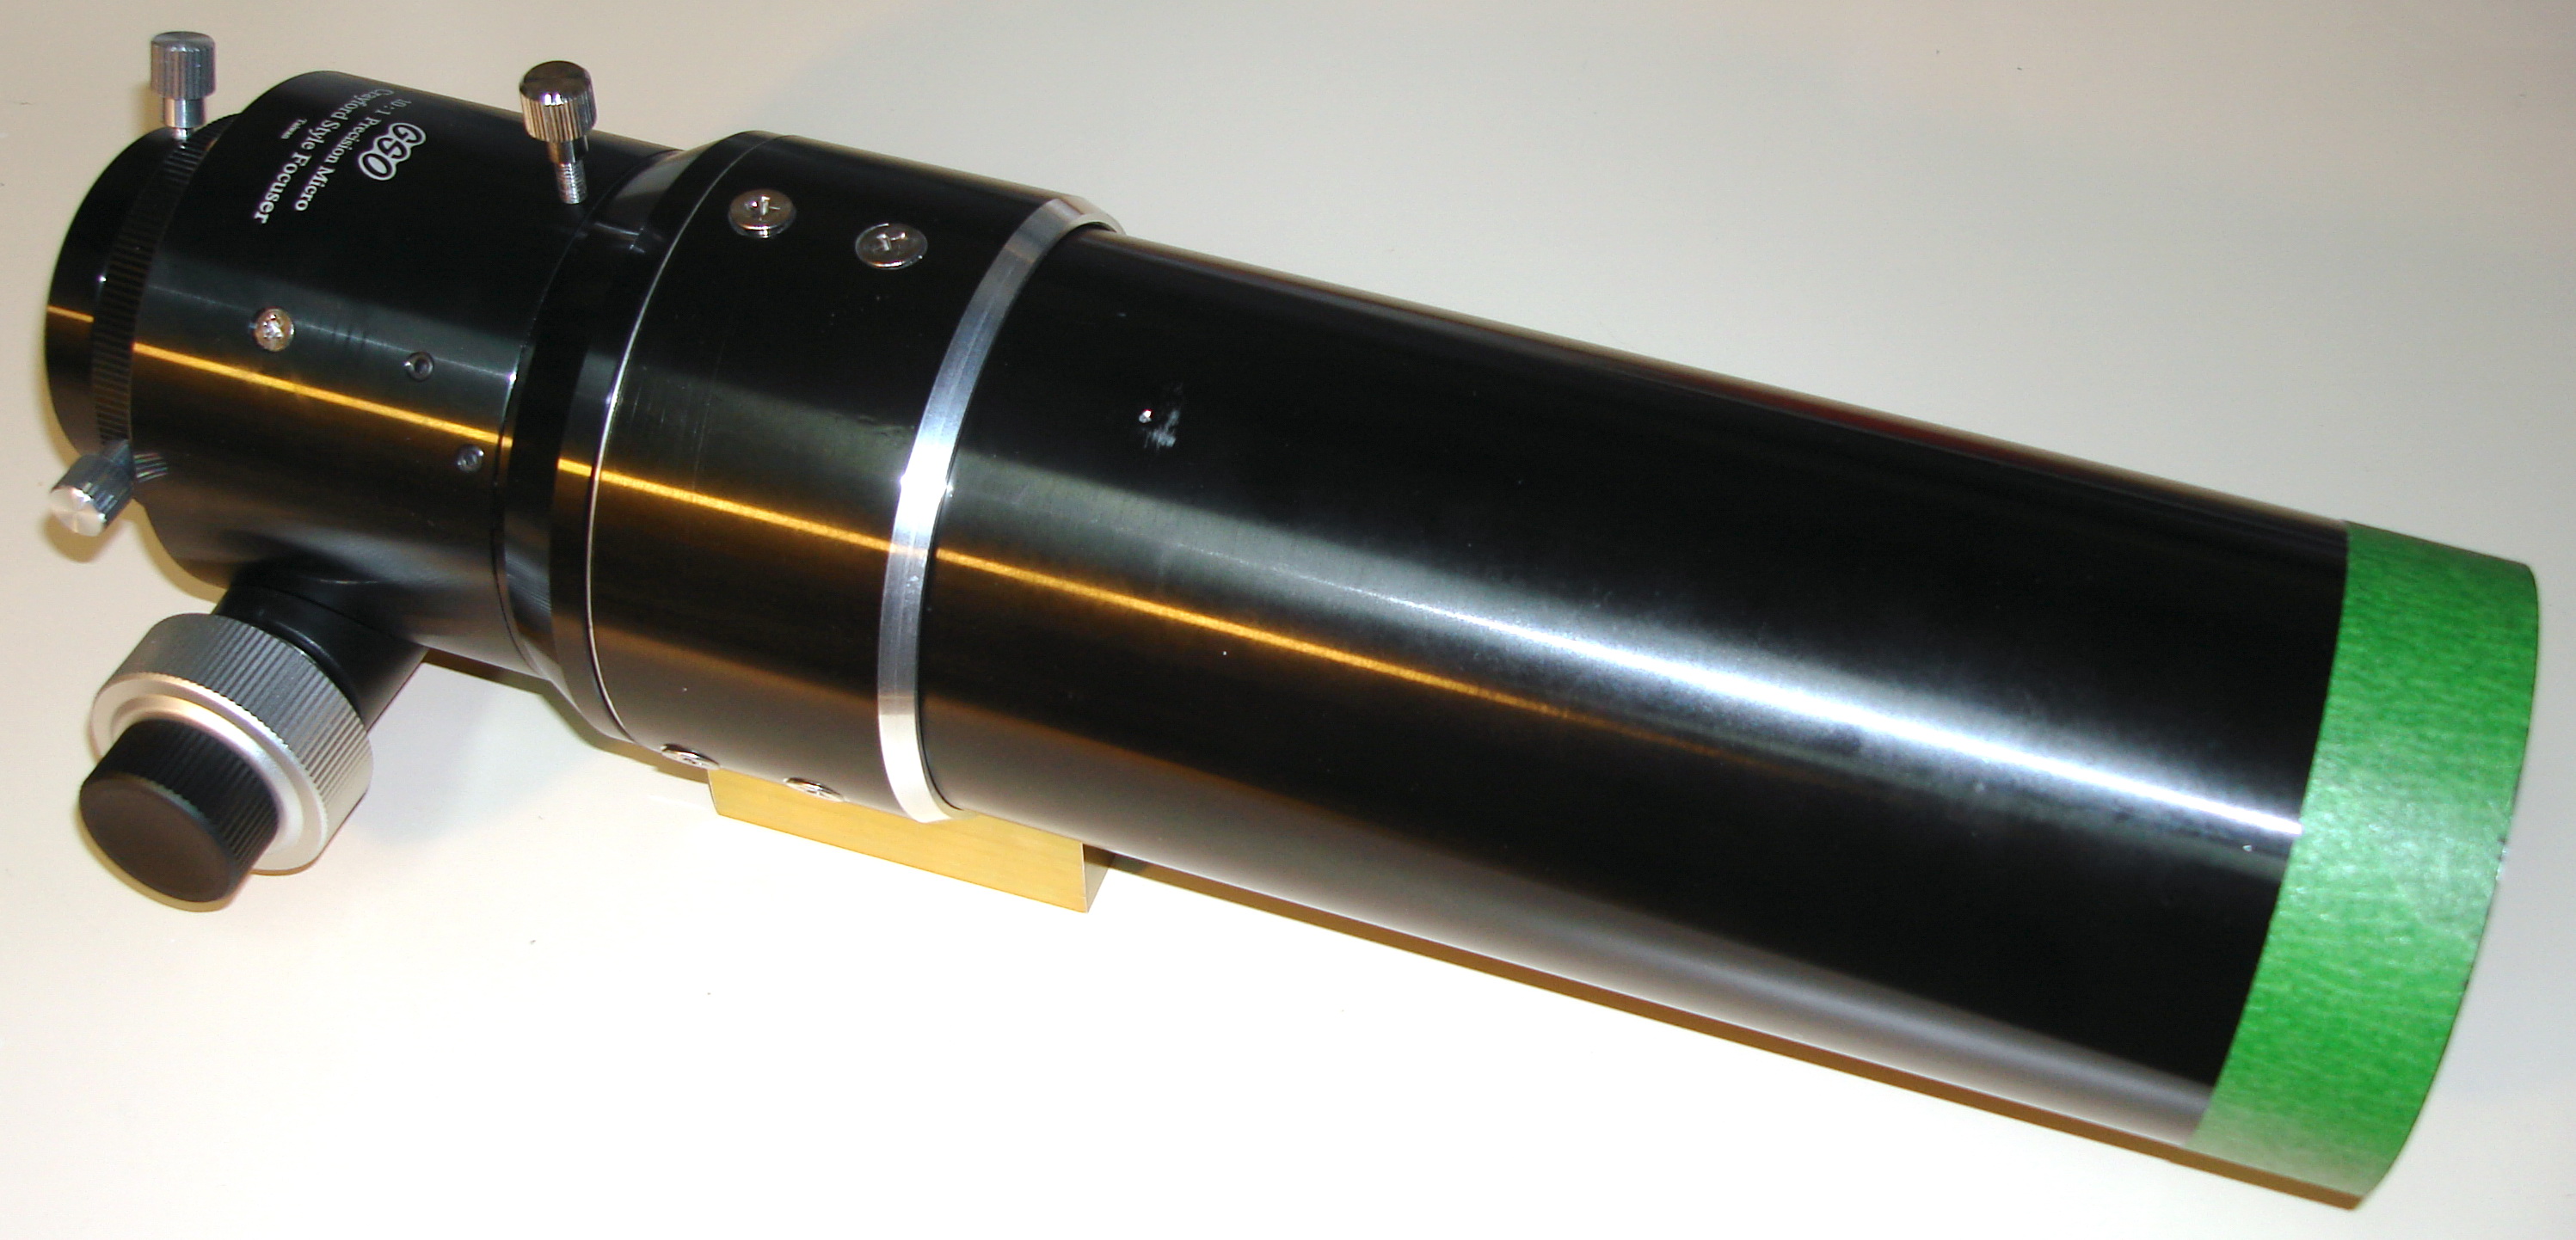
| December 5, 2009 The Crawford-style 2" dual-speed refractor focuser I ordered from Agena Astro came in today. Wow, is it sweet! It is big and solid. Nice detail on the machining. I liiiike it! It is made by GSO, a Taiwanese manufacturer. I am quite impressed by the quality for such a low price of $150 USD. I've ordered quite a bit of stuff from Agena Astro now. I find them to be a great store (good products, good prices, cheap fast shipping), and their customer service is awesome.
|
| January 21, 2010 Well, all the components are here, so
it is time to start building. First thing is to figure out how long
to make the optical tube. I installed the new objective lense into
the Lumicon optical tube (after some sanding to enlarge the ID of
the tube by 0.5mm...wow is black anodize ever hard to sand!), and
used cardboard and duct tape to attached the focuser to the other
end. I mounted the contraption onto a camera tripod and took it
outside. It was a nice clear (but freezing!) night so I had lots to
target. I put each of my eyepieces into the focuser and focused on a
bright object in the sky; in this case the waxing quarter moon. I
focused each eyepiece, and then noted the focus distance on the
focuser tube (btw, it has a scale graduated in inches and mm). From
these measurements I will determine how short to cut the tube so
that I can use it with and without a diagonal. |
| January 26, 2010 I figured how much to cut off by moving the focus distance for each eyepiece in straight-through configuration to the bottom of the focuser travel (focused all the way out). This worked out to about 60mm I had to cut off the tube. I took the tube to work and used the lathe there to cut off the tube and reface the end. The machining got a little hairy at times. I had the tube held just by the three-jawed chuck at one end. As I machined, it started to vibrate like a bell, and eventually the vibrations resonated to such a large magnitude that the tool would suddenly dig into the wall of the tube and pull it free of the chuck! Gah! As a result my tube has some small nicks on the outside, and I had to cut off and reface the objective end of the tube as it got warped and gouged pretty badly when the tube was wrenched off the chuck. Mental note: when machining long hollow tubes, use a secondary support! In the end I was reasonably happy with how it turned out. I also used the opportunity to better sand the objective end ID so that the objective slides in better. |
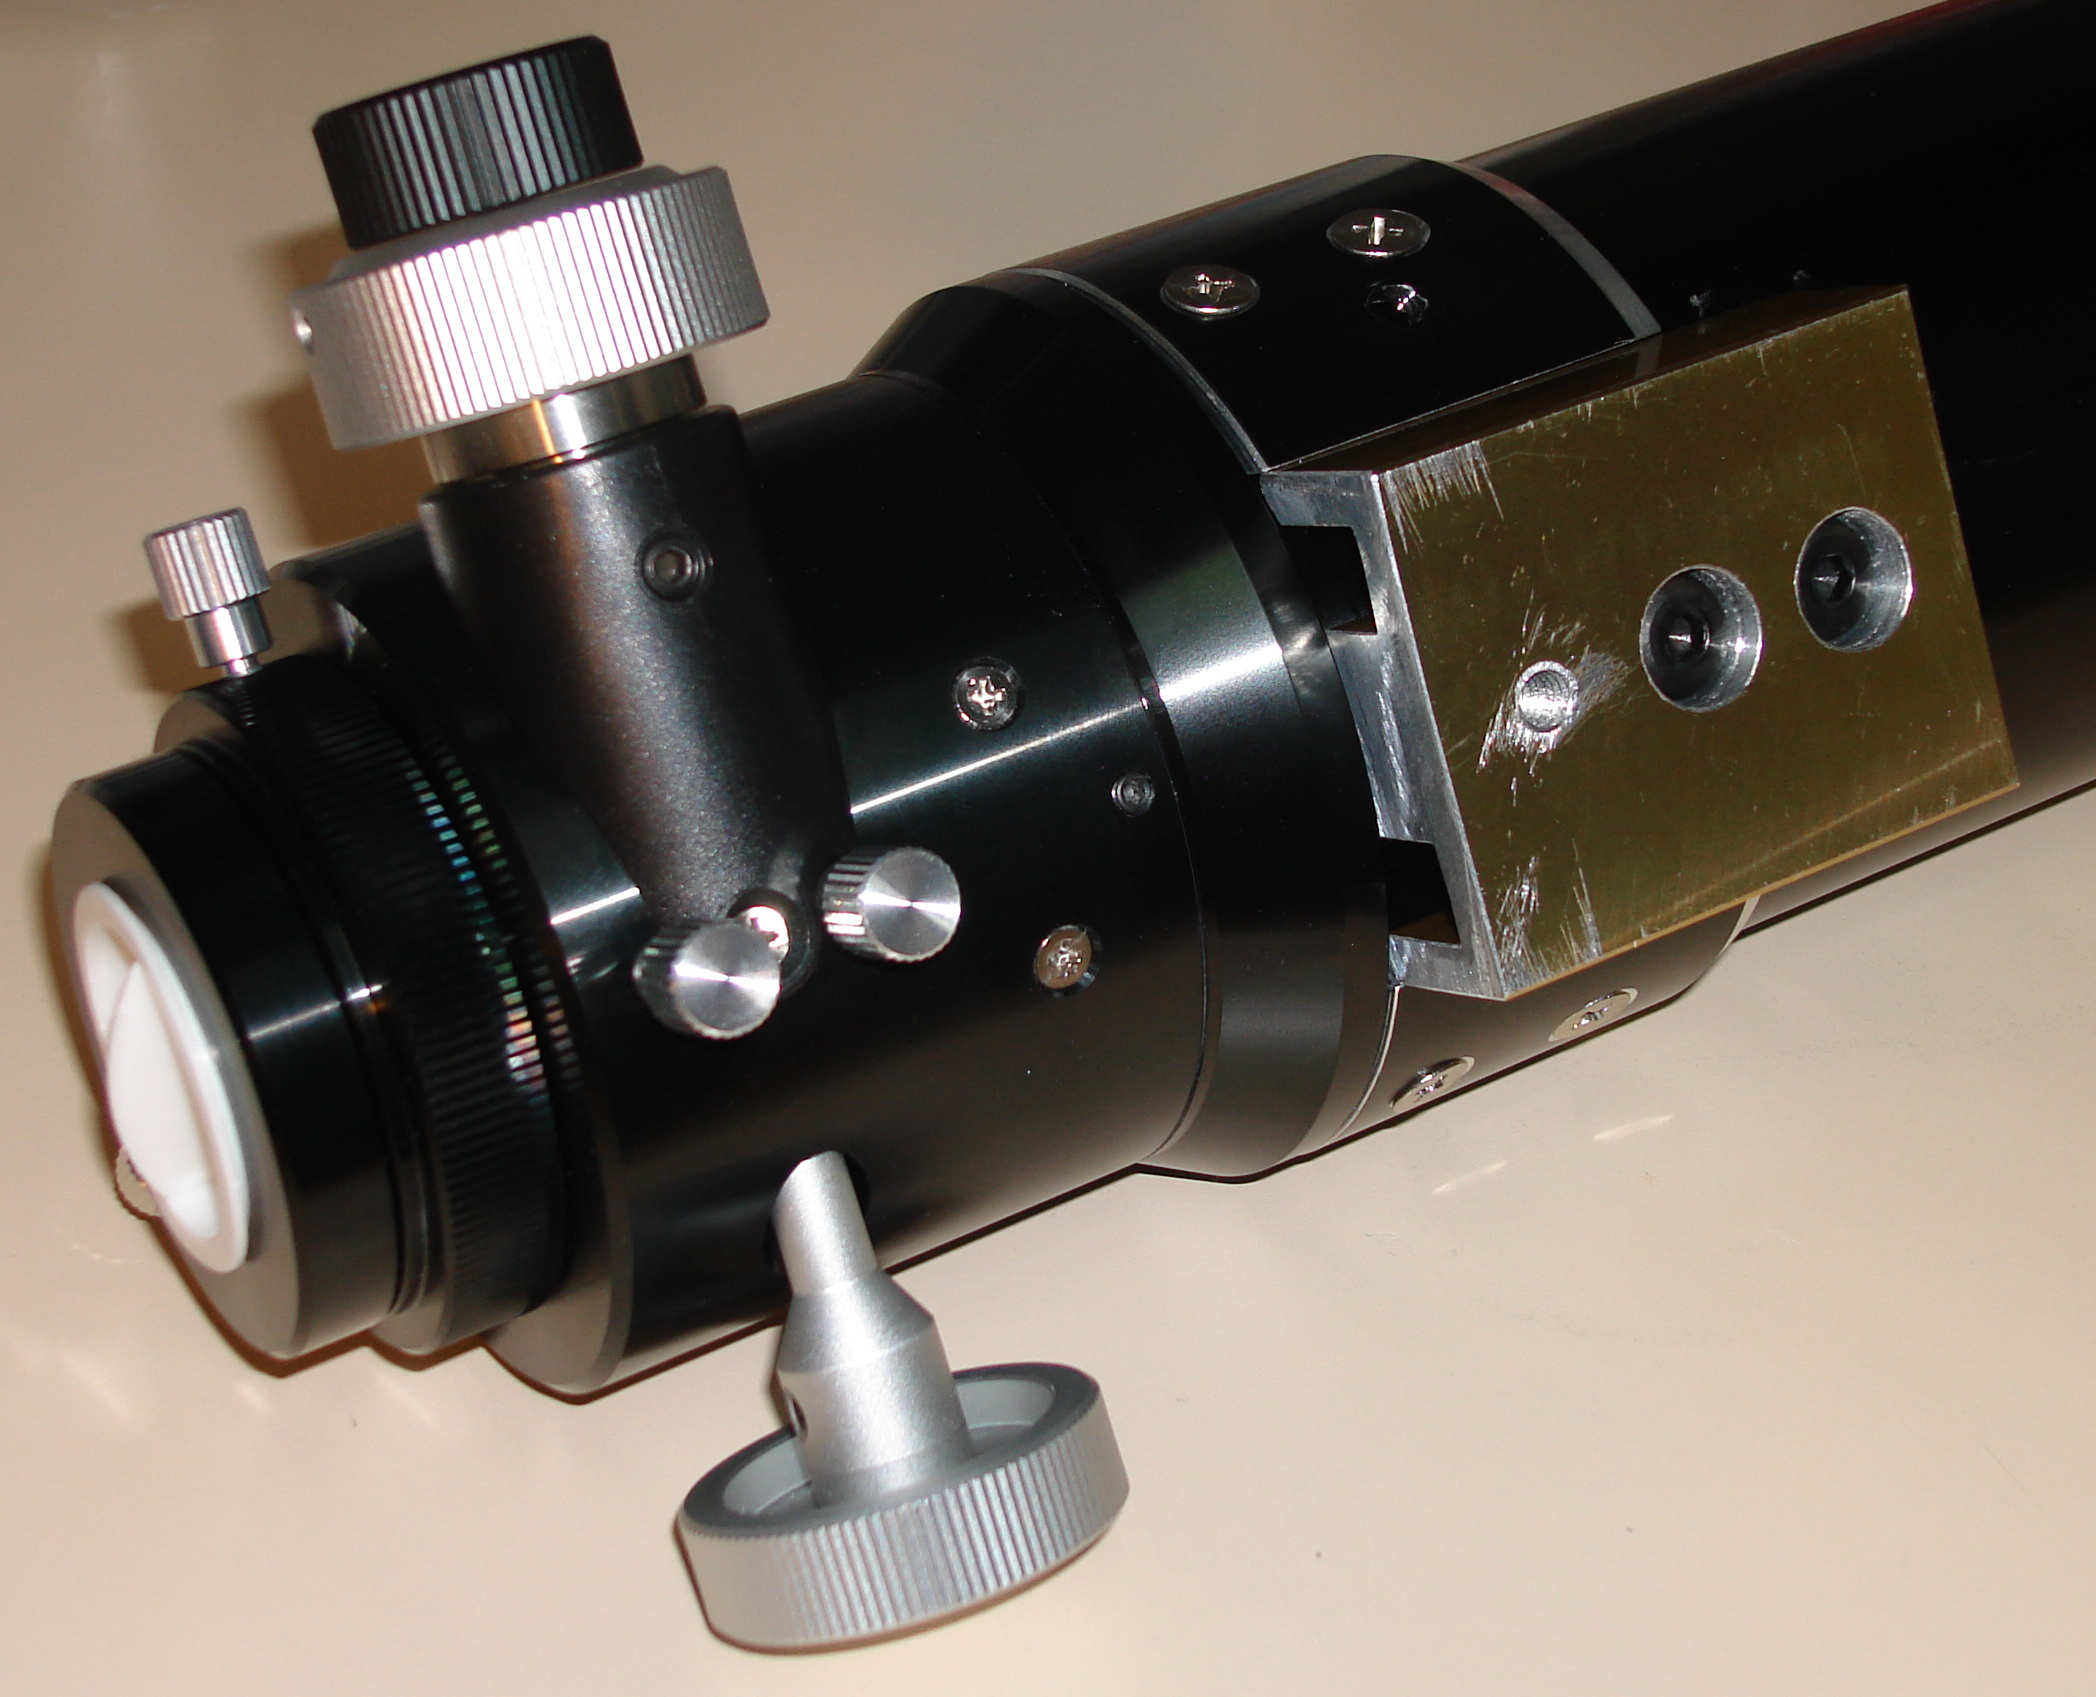
| January 29-31, 2010 Now that I have an optical tube, I have to come up with a way to mount it to the focuser. The OD of both the tube and focuser is essentially the same at 86mm. I had toyed with getting my buddy that made the mounting bracket machine me a collar, then I thought about modifying a coupler from PVC piping, but in the end I had a eureka moment and ended up making use of the 60mm I previously cut off the optical tube. I took it back to work and shortened it and cleaned up the ends on the lathe. Then I split it and used a bench vise to slowly stretch it out into a 'C' shape that conformed as close as I could by hand to the OD of the optical tube/focuser. The remaining part of the circumference around the optical tube I had already planned to be covered by the mounting bracket. Funny, in the end when I figured out where the new centre-of-gravity would be, the mounting bracket ended up right at the focuser end of the optical tube! I had to cut the bracket Scott made down a bit to get the mounting point as far back as possible.
|
| February 1, 2010 Well, all the parts are formed. Time to assemble. I re-tapped the mounting holes in the focuser from M4 to 10-32 as I thought they needed to be a little beefier, and there was a better choice of non-metric hardware at local stores. I then drilled corresponding holes in the focuser end of the coupler. With the coupler installed on the focuser I then slid it over the optical tube and through drilled holes for the screws on that side. After finishing off all the required threading, countersinking, and deburring, I screwed it all together. I then tapped the mounting bracket in position and through drilled the mounting holes into the optical tube. Once the holes were all cleaned up I bolted the mounting bracket in place with 1/4-20 bolts and nylock nuts...that sucker ain't comin' off! Finally I disassembled the focuser from the optical tube in preparation for the next step: baffling!
|
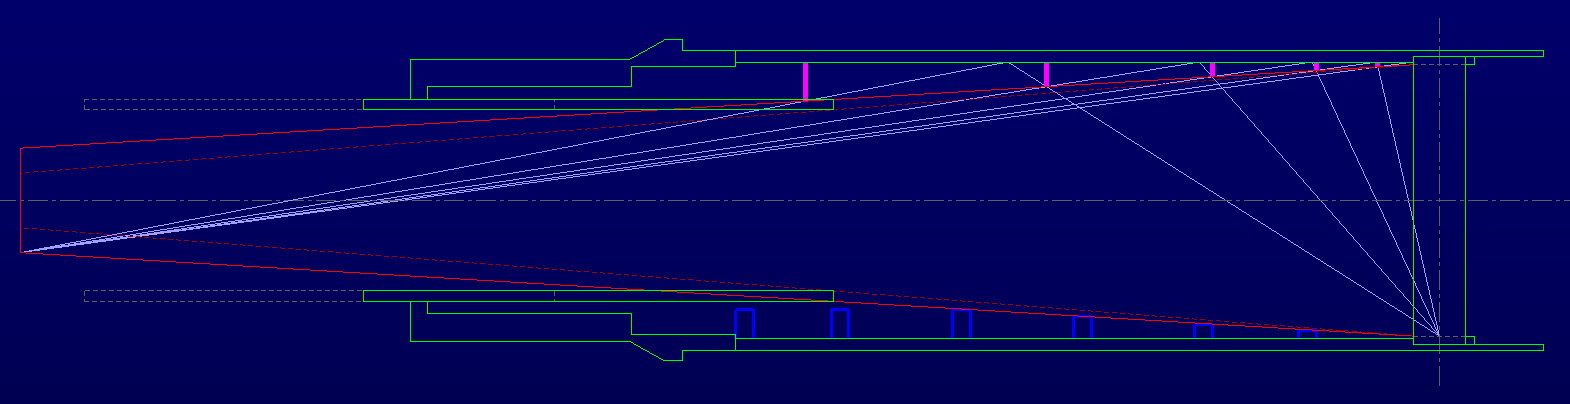
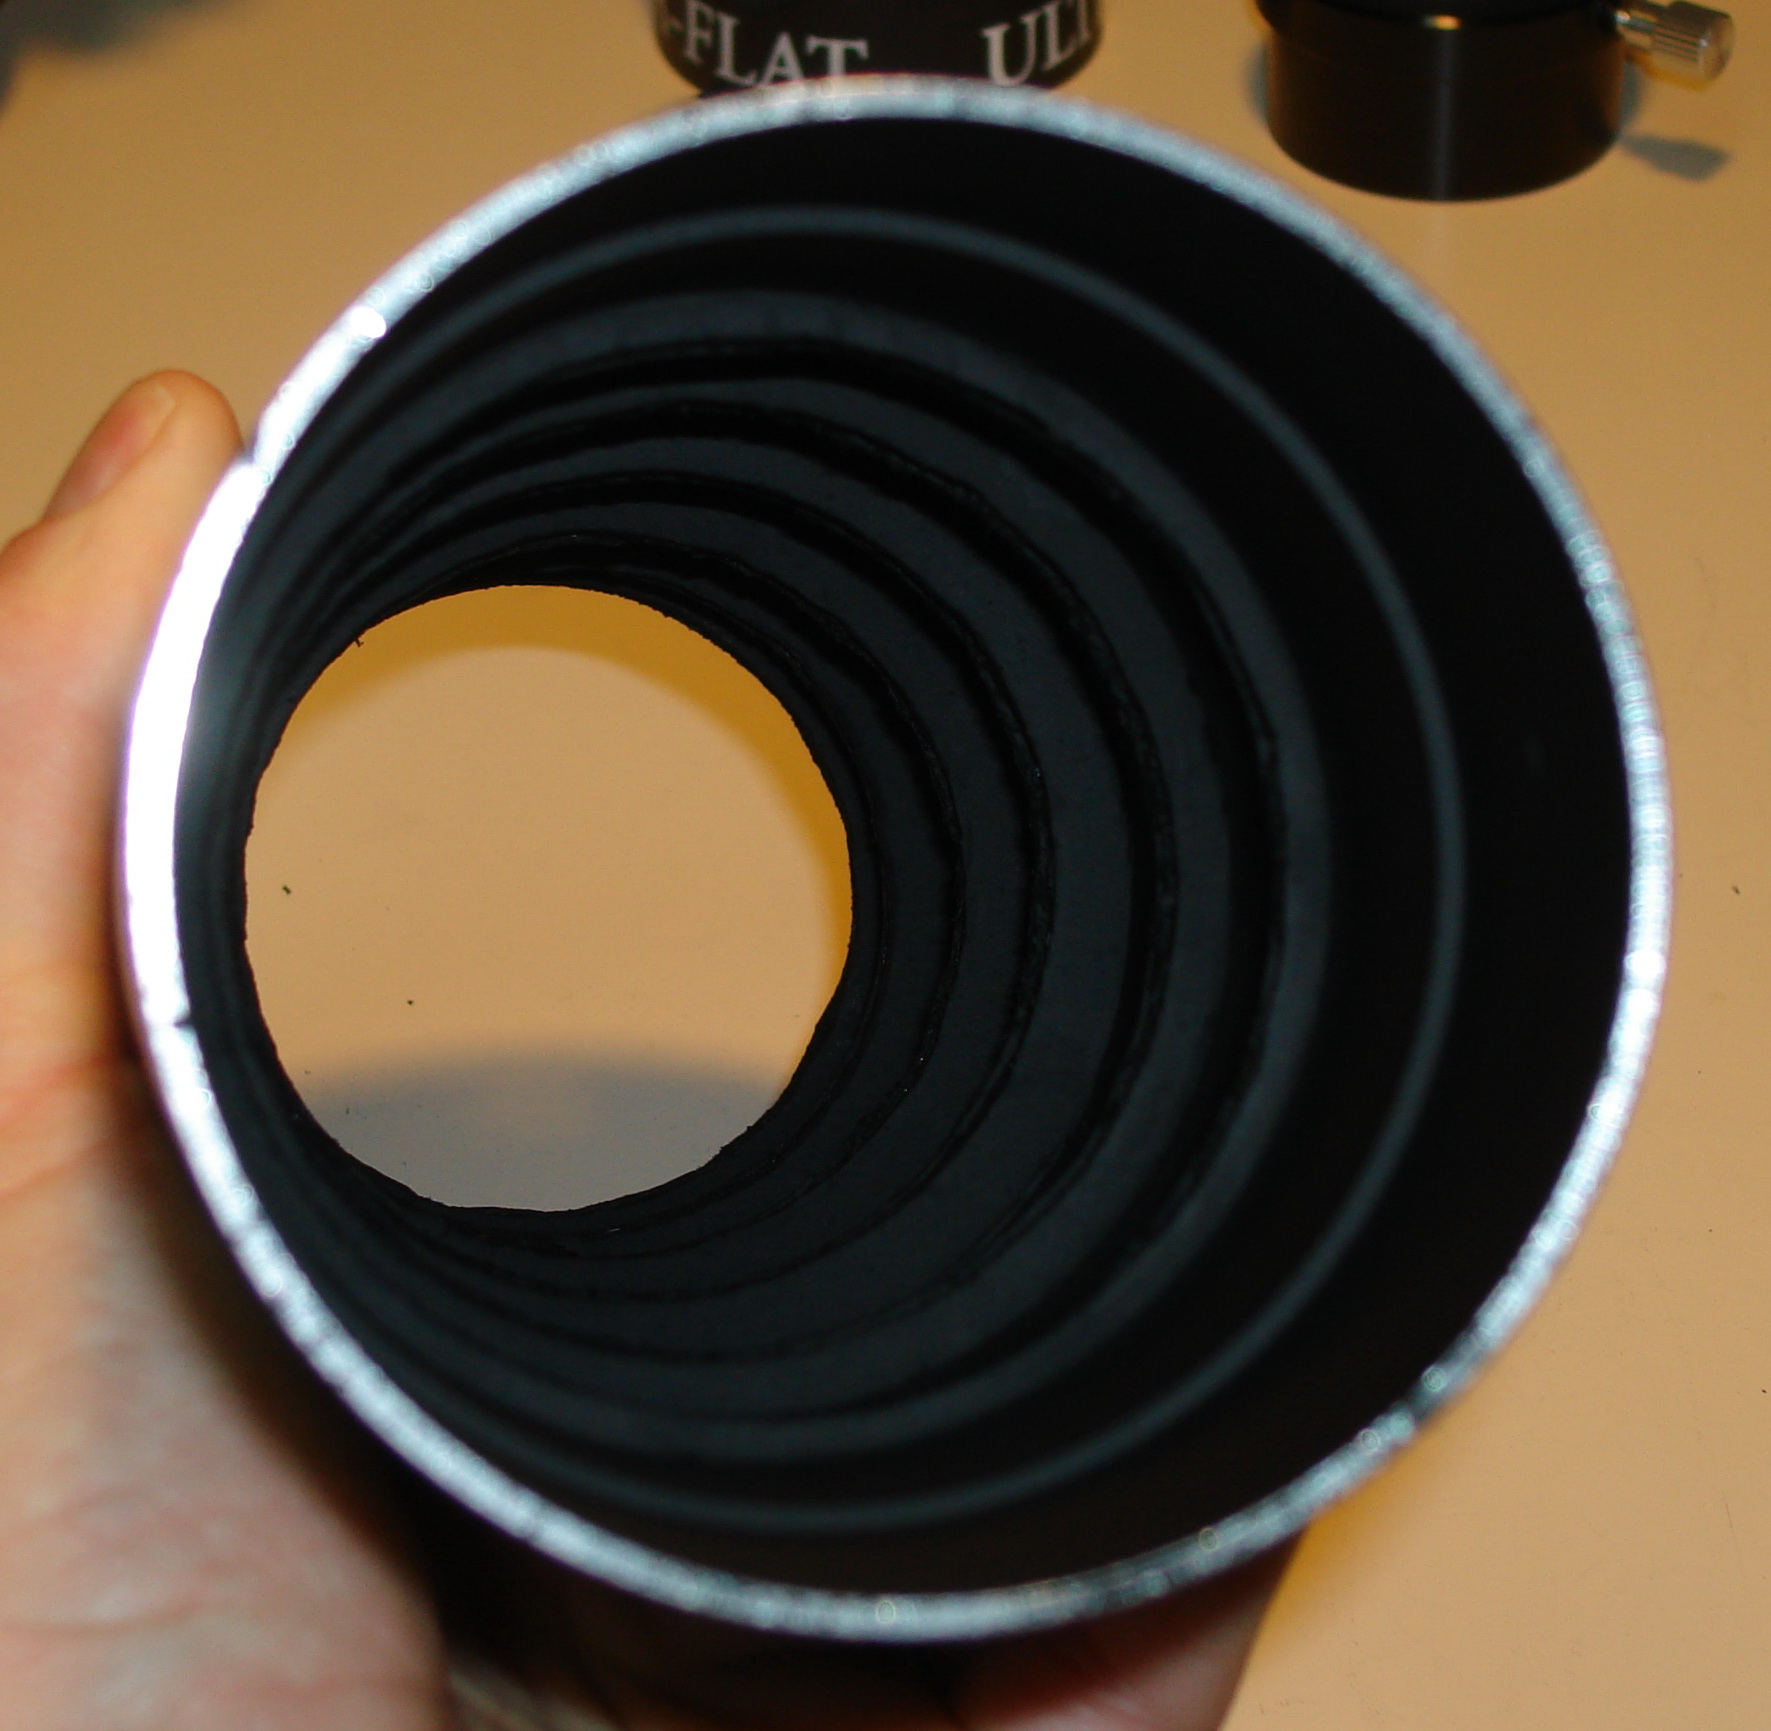
| February 6, 2010 I found some good advice online about how to figure out the optimum baffling configuration. I based my baffle layout mostly on the method presented by Scott Berfield (www.berfield.com/baffles.html). I've included a copy of my CAD file below for anyone interested. I worked out the optimum baffle arrangement according to Scott's graphical method assuming a desired image size of 30mm (see the pink lines in the image below), then tweaked it in a couple places (the dark blue blocks in the image below):
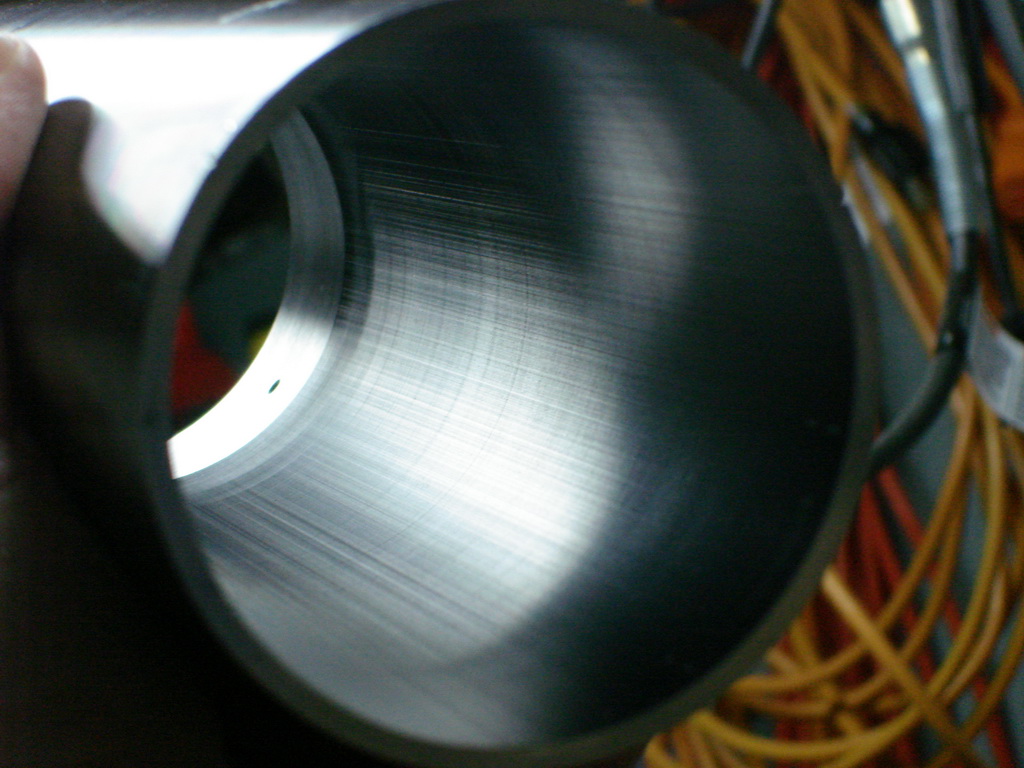
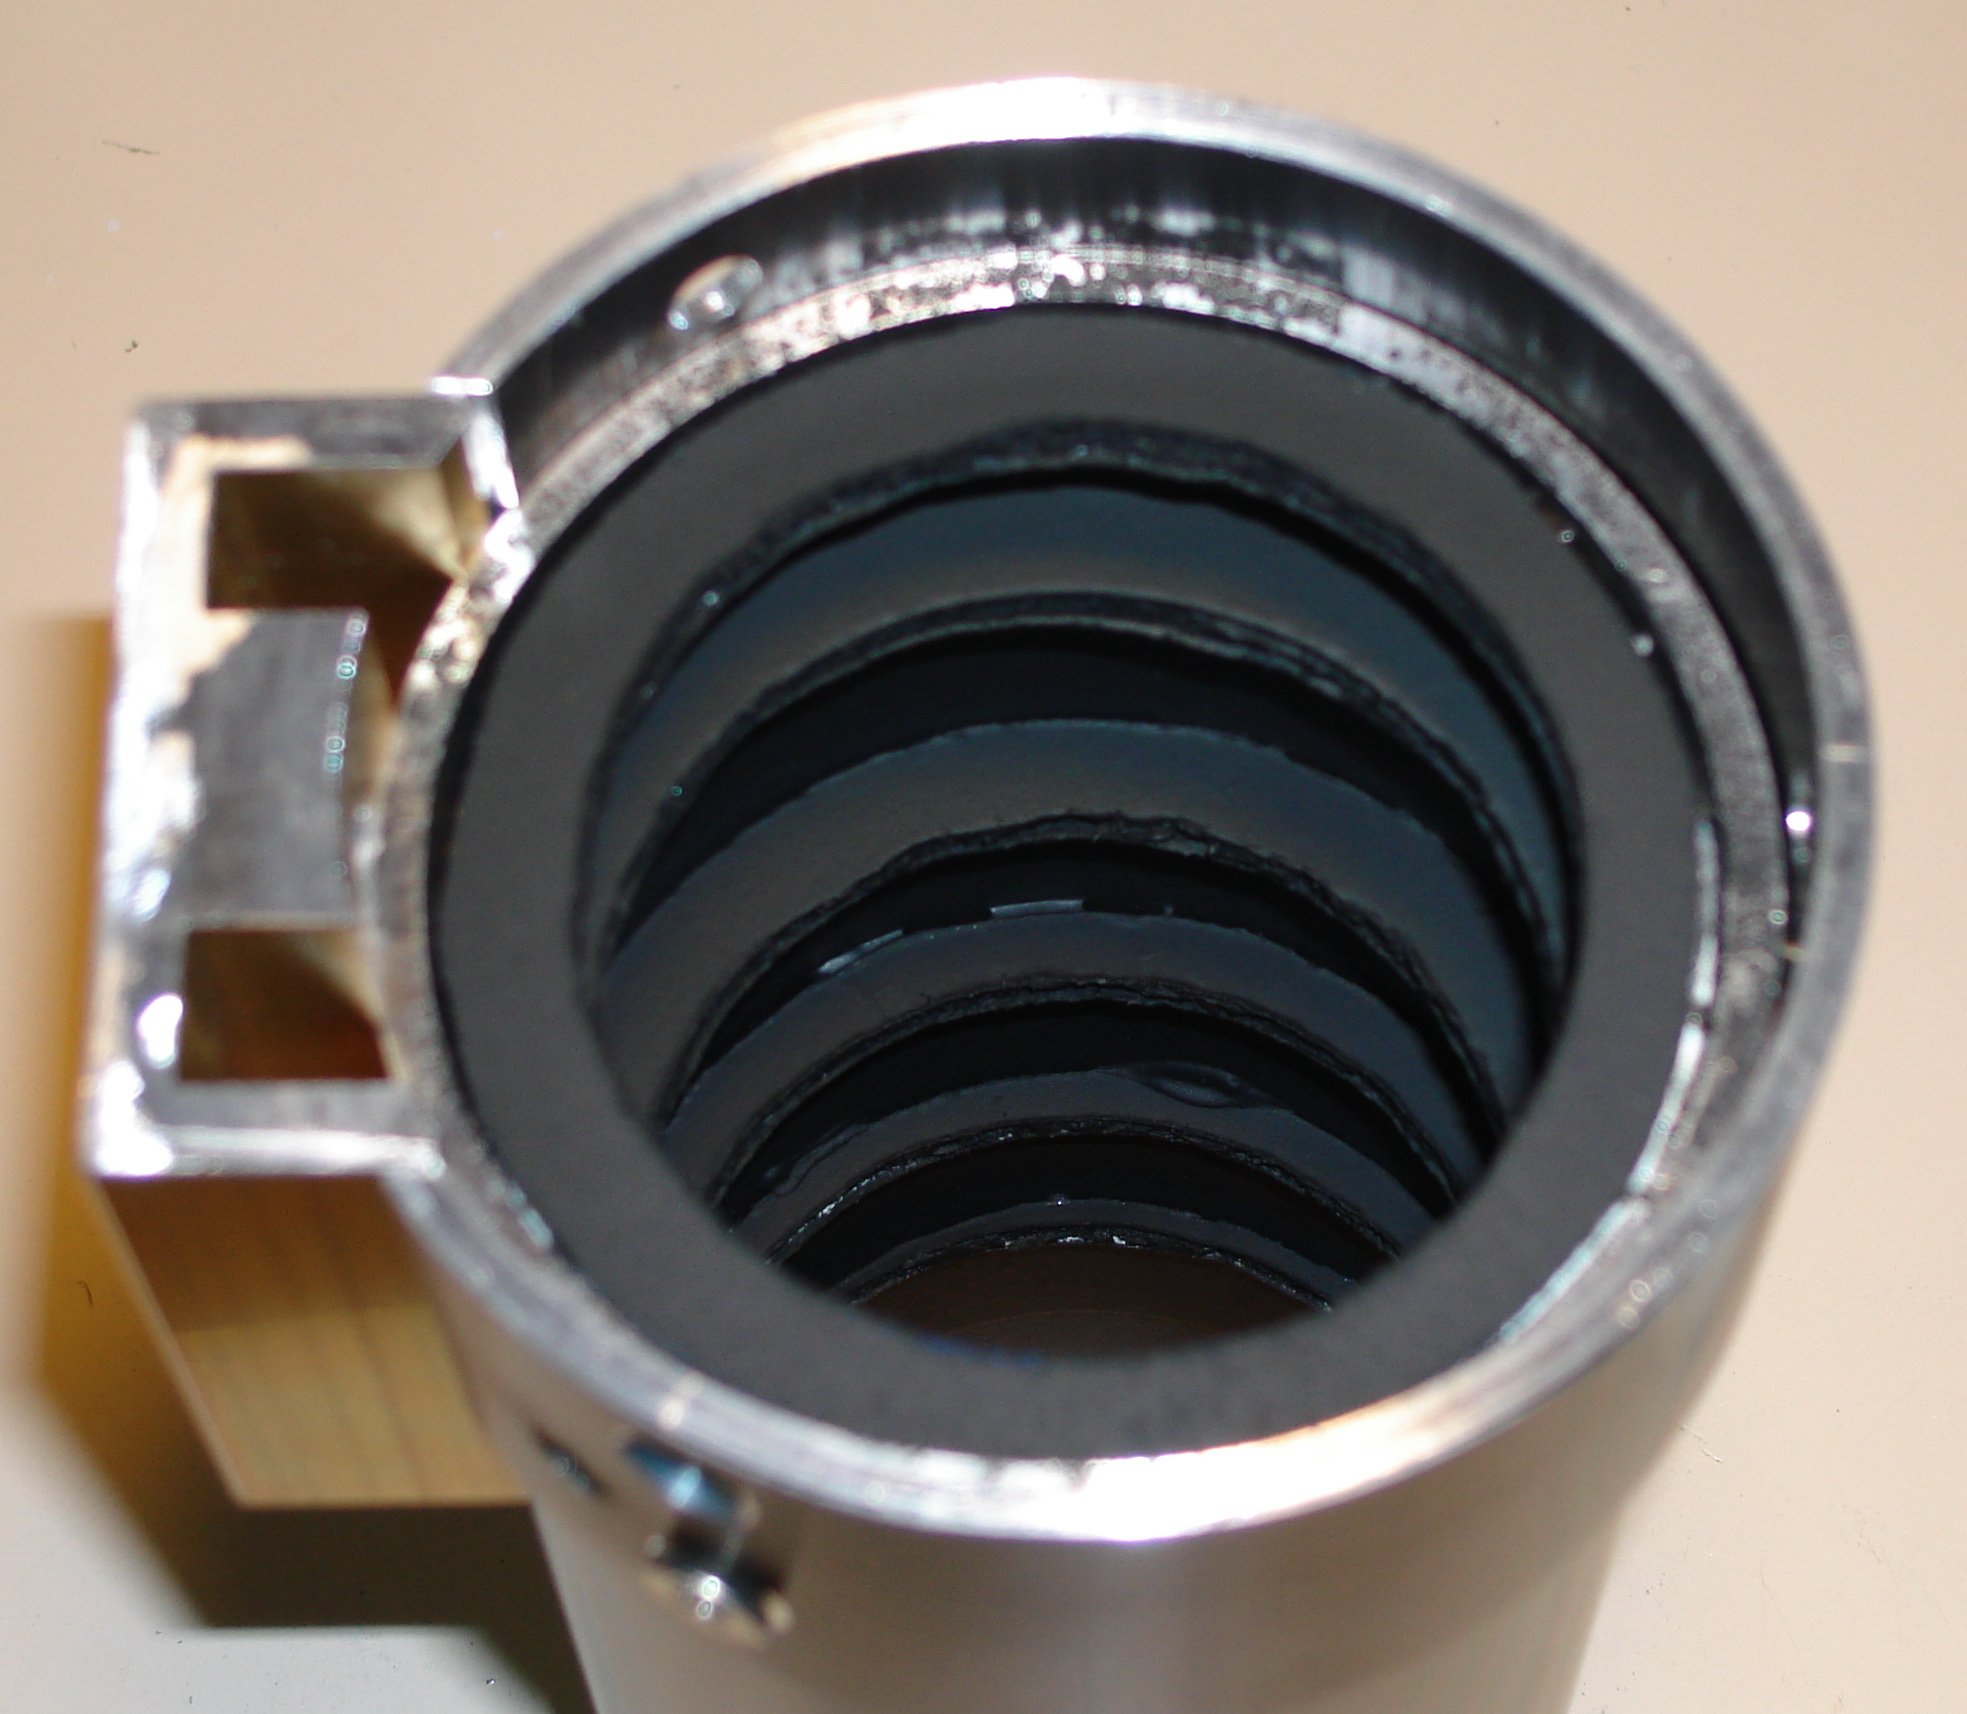
I made the baffles out of 5mm thick poster board (foam with heavy card stock on either side). They came out okay, but certainly not anything like the precision ones you get in a professionally built scope. I painted the baffles using flat black paint from Krylon (called Ultra-Flat). The paint seemed to eat the foam a bit, so I ended up hand painting the edge of the baffles with black hobby acrylic paint. I installed each baffle one-by-one by first applying a ring of Goop (a household glue) at the appropriate location in the optical tube, and then sliding the baffle down into position. As I went I touched up the spray paint on the inside of the tube and on the baffle. All-in-all it didn't take too long to get the baffles all into place. I also painted the inside of the focuser to improve the reflections there. Upon initial inspection it appears that the baffles actually work! The side walls look dark when you look up the optical tube...all but the last bit up near the objective. I painted that area flat black, but the diffuse reflection is still noticeably worse than the baffled part of the tube. I think I'll have to get some of that flocking paper stuff.
I was eager to try the scope out, so I assembled it and took it outside. For a day that had been beautifully clear, it sure clouded over fast! My nice view of Mars and Sirius is gone! Oh well. I used the apartment building that is about 1km away as a target instead. Focusing for all eyepieces in straight-through mode was good; right at the bottom of the focus travel. I then tried focusing with both my 2" 90deg diagonal and 1.25" 45deg correcting diagonal...I could not get a focus with either! Crap! I also had trouble with the focuser slipping, but figured that out by adjusting the tension screw on the focuser. |
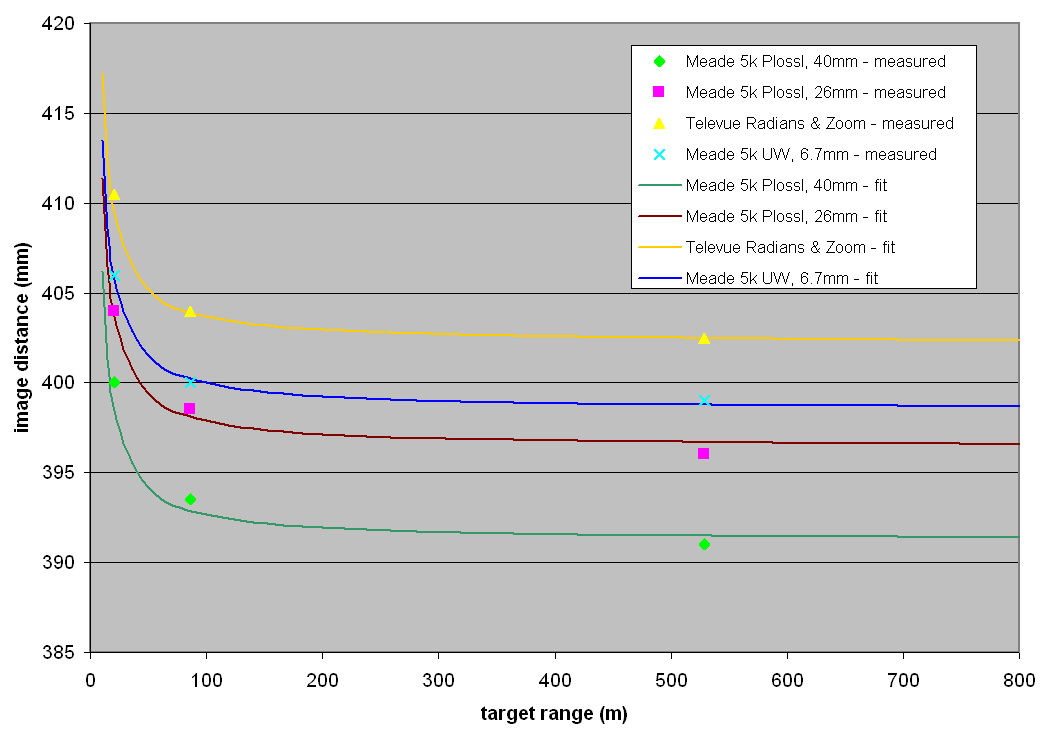
| February 7, 2010 I needed more precise information about where I was at with the focus distance thing, so I set up the telescope in my daughters room. I chose three targets that I could see out her window: my neighbour's oak tree (21m), a house on my street (86m), and an apartment building in the distance (529m). I chose to view from inside as I didn't really feel like going out into the cold to do all this eyepiece swapping and writing and stuff. I just needed to determine focus distances anyway. The ranges to my targets btw were worked out using the satellite view of my neighbourhood on maps.google.com. My hope is that I can extrapolate these measurements to focus on an object at infinity (ie. astronomical targets), and determine how much I need to cut of the tube to be able to use my diagonals. A plot of my measurements and my curvefits is below. I found some reading on Thin Lense Theory, which doesn't exactly apply, but it did at least identify the fact that the relationship between focus distance and target range is a simple hyperbolic (focus distance = A/range + B).
I tried only the 45deg diagonal in this test as it is physically smaller and thus should have a shorter light path length than the 2" 90deg one. I was almost able to get focus with it and the 26mm ep when looking at the oak tree. I figured that to get a focus at infinity with this ep and the 45deg diagonal I'd need to cut another 33mm off the tube. Hmph. |
| February 8, 2010 I've been considering all the options,
looking at the impact of further shortening the optical tube. What a
pain that would be at this point! Looking at my computer model of
the scope, I think that it would be a bad idea to make the tube
shorter. Presently the length of the tube, and where that results in
the focuser being positioned, is desirable from a light-cone
perspective. When fully focused in the end of the focuser tube cuts
into the light-cone I originally designed the baffles for, an image
size at the focal plane of 30mm. The focuser tube cuts this down to
15mm when focused all the way in. All the way out the focus tube is
just outside the baffles, giving an image size (with no baffles) of
36mm. This seems pretty good to me...for all of the focuser travel
the light cone is not restricted at all for eyepieces less than 15mm
(assumes ep image size = ep field stop diameter ~ ep focal length).
The 26mm would have to be focused out at least half way to have no
restriction. For the 40mm I knew that I was going to end up cutting
into its light cone when I chose the 30mm image size for the
baffling, so that's okay...there has to be some compromises!
It has been a long stretch now with cloudy nights, so I have not had a great opportunity to really see what the view through the scope looks like. Tonight there was light clouds with light snow flurry action, but I could see through thin patches in the clouds to Mars and Sirius. I figured what the heck, and brought my new scope out to try. I used just my 26mm and 6.7mm eyepieces as I was really just interested in a quick look to determine if the flaring I saw back in January was fixed, and how the chromatic aberration looked. Well to be honest the view was pretty darn good! I couldn't really see any chromatic aberration. Maybe the light cloud and flurries worked like a fringe killer filter! The view of Mars was not that spectacular, a light orange disk. However the focus was sharp with no distortion, and no flaring! Seems very promising. |
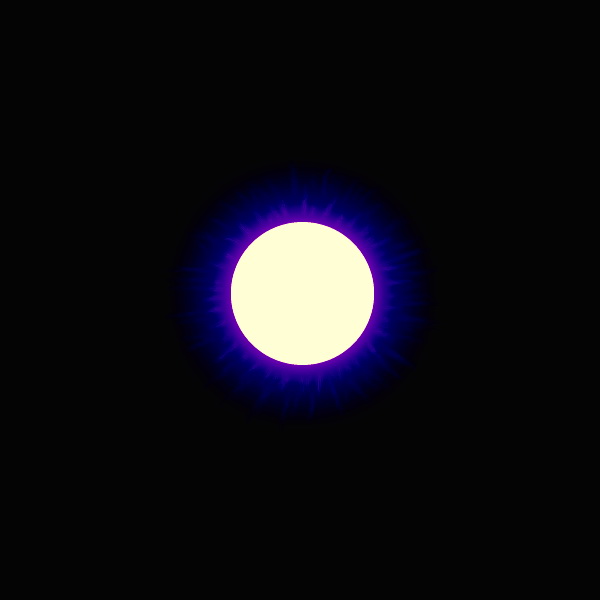
| February 10, 2010 I came home from my CASI meeting tonight and TADA! it was clear out! I quickly hauled the 80mm up from the workshop and setup before it clouded over or snowed or something. I used my 26mm, 6.7mm, and 2-4mm zoom eyepieces. My main target was Mars, as I wanted to better assess the view looking at something bright. Well as I suspected, there is a noticeable chromatic aberration. A purple and indigo spikey halo around the view of the planet (see sketch). The disk was nice and sharp, it just had the fringe around it (see sketch below)...good thing I ordered that "fringe killer" from Agena Astro! I did my best to zoom right in with the 2-4mm zoom, but without a proper slo-mo Alt-Az mount, finding Mars and keeping it in the middle of the eyepiece view was pretty much impossible. From what I could tell, the view was pretty good right down to 2mm (200x magnification)...I will have to report in on that one again once my Alt-Az mount gets here.
The view of stars, even of Sirius, had not much of a
purple fringe on them, practically none at all actually. Stars
looked like points with short spikes all around the perimeter...is
this how they are supposed to look? I also had a look at Orion's
belt and the view was very nice. Stars were sharp, and I could
clearly see the light and dark lanes in M42. Surprising to me was
that I could actually see all 4 stars of the Trapezium!...even with
the zoom eyepiece! Wow, I haven't even accomplished that with my 8"
SCT yet! (further evidence I need to collimate that sucker) So far I
am very pleased with my creation's performance. |
| February 12, 2010 I took the objective out and gave it a better cleaning (I did a pretty lousy job the first time). I also got some self adhesive flocked paper from Kendrick Astro Instruments that I applied to the objective end of the tube where there is no baffling. I added some velcro pads on the objective end so that the lense cap I bought fits more snugly, and to give somewhere for other things to attach like a Bahtinov mask or a solar filter. Now that the scope is all re-assembled, it is officially done. Nothing more shall I do to it other than enjoy its views! |
| February 22, 2010 I purchased a 1.25” dielectric mirror diagonal to use instead of the cheap Meade prism diagonal, however it added too much to the focus length and wouldn’t work…doh! Go HERE to see what I did to solve the problem. |
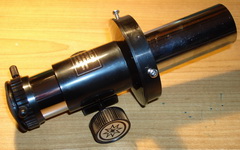
| March 15, 2010 Well, I said I was done tweaking the scope…well I was wrong. My Alt-Az mount came in; a Stellarvue M1 mount with Vixen style dovetail. It just made more sense to remove the custom mounting bracket and replace it with a standard dovetail that matched the mount. NOW I’m done. |
| May 20, 2010 Yeah, uh, remember when I said I was done tweaking? Well apparently I can't leave things along. I want to be able to quickly switch between mounting the 80mm to my Alt-Az mount and piggy-backing it off of my LX-10. To mount it to the LX-10 I purchased an ADM brand dovetail and mounting plate from Adirondack Astronomy (a sweet setup actually), and modified the mounting plate to have two locator pins that align the 80mm scope consistently relative to the LX-10. I tweaked the alignment by hand bumping before drilling and installing the locator pins. Alignment in the other direction (towards/away from LX-10 long axis) was done simply by applying layers of tape to the front or back of the mounting plate until alignment was achieved. The final setup is consistently aligned to within about 1/4 to 1/2 degree.
|
Go back to HOMEPAGE
Last updated: 25-May-10
|
Copyrights to all content from the webpages hosted here belongs to Jim Thompson. Nov. 2009. |